Creating the perfect karaoke experience means having lyrics that perfectly match the music. While our AI auto-sync feature works great most of the time, sometimes you'll want to make manual adjustments for that professional touch. This guide will walk you through using the Lyrics Editor to perfect your karaoke tracks.
Prefer watching over reading? Check out our quick video tutorial below to see these Lyrics Editor techniques in action:
Before diving into the editing features, you'll first need to know how to access the Lyrics Editor. From your video project page, click the microphone icon on the left sidebar to access the Lyrics menu. From there, simply click the Open Lyrics Editor button. The Lyrics Editor opens as its own page.
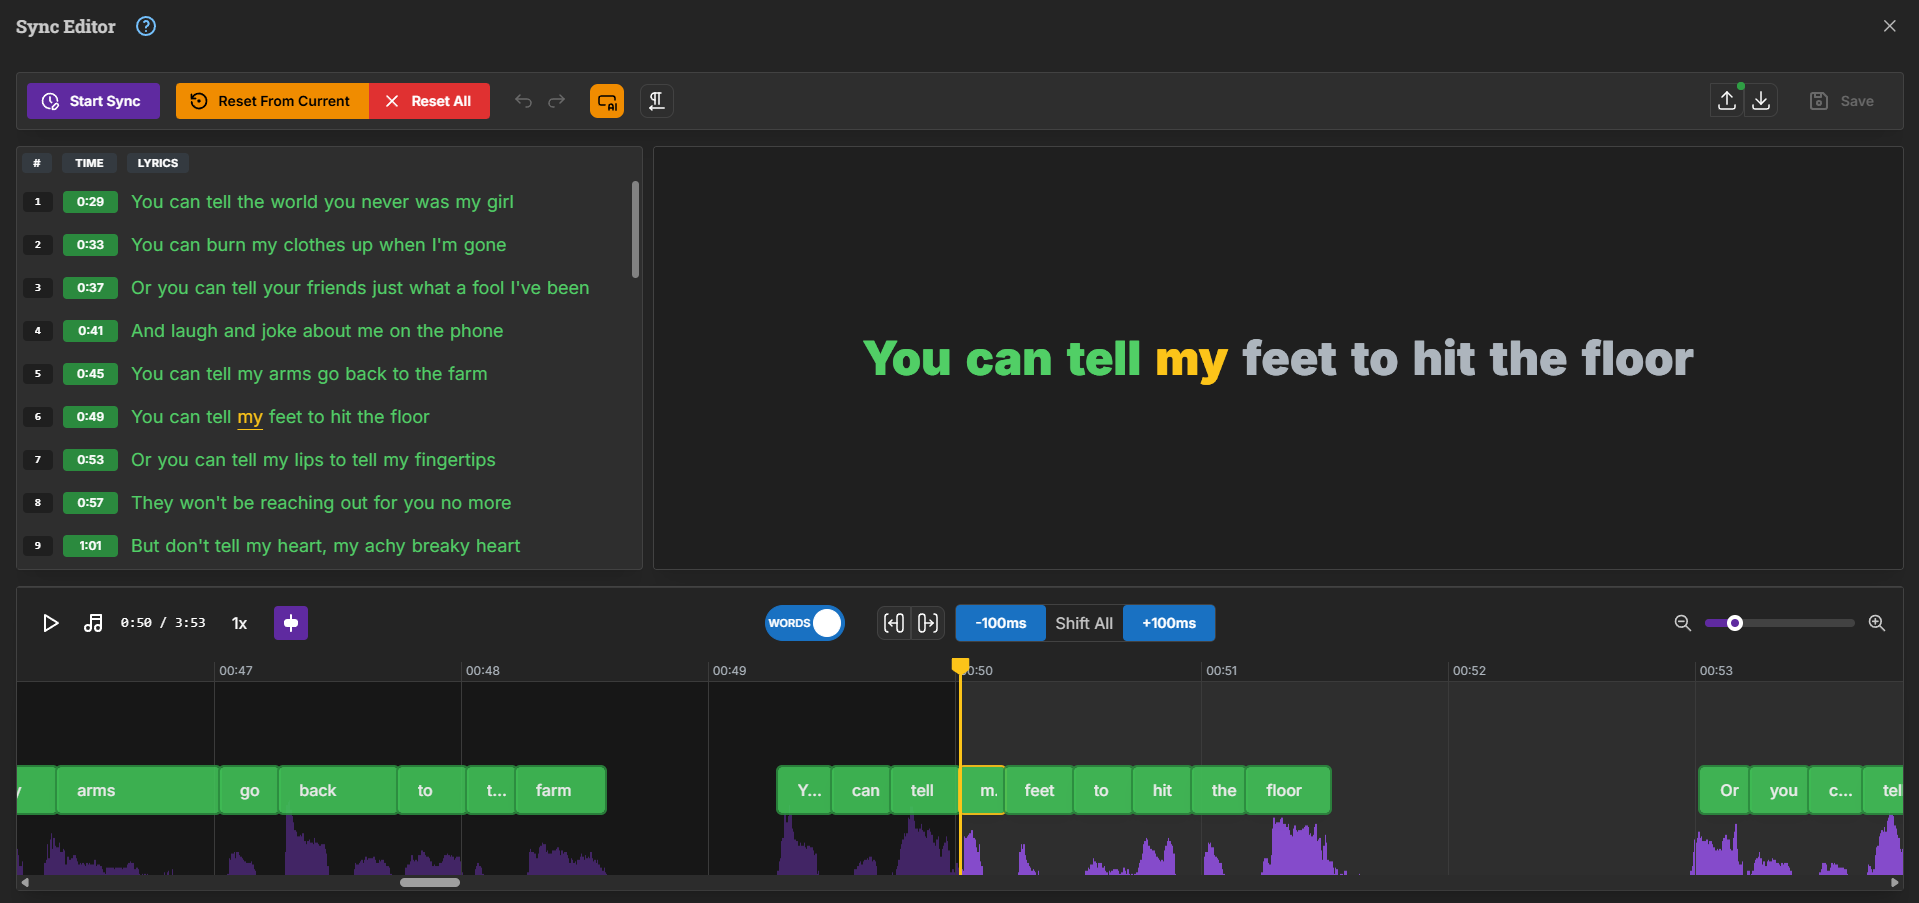
The Lyrics Editor is your command center for perfecting lyric timing. When you first open it, you'll see several important sections that work together to help you create perfectly synchronized lyrics.
Tip: on a phone, turn it sideways. The Lyrics Editor works in landscape mode.
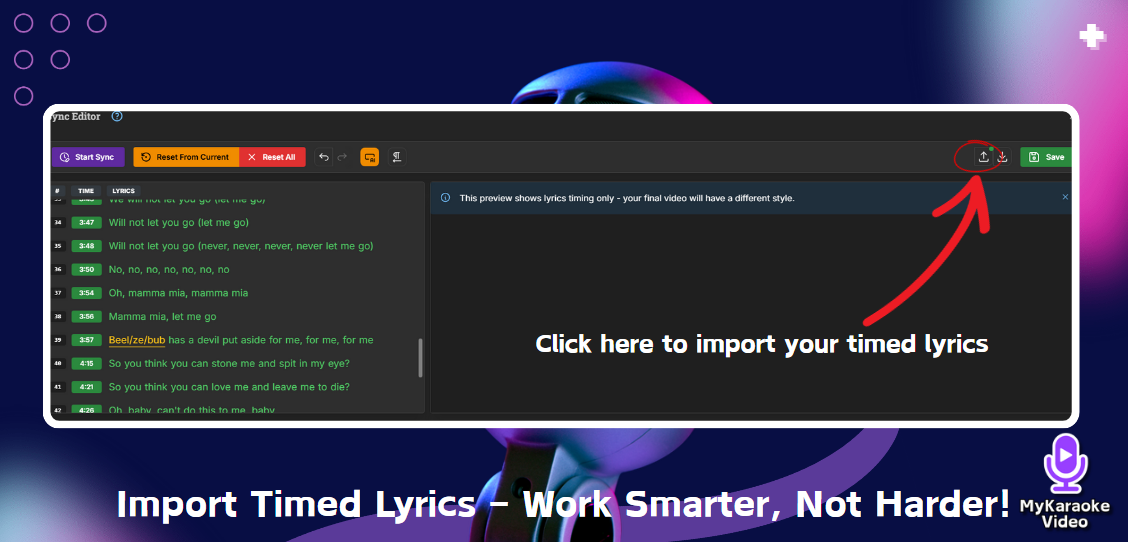
The Import Lyrics feature allows you to upload pre-timed lyrics directly into the Lyrics Editor, saving you time and effort when creating your karaoke videos. This is perfect for users who already have lyrics files in supported formats and want to skip manual syncing.To import lyrics:
Open the Lyrics Editor and click the upload icon next to the Save button (tooltip: "Import new lyrics from file."). Importing replaces your current lyrics.
Upload your file by dragging and dropping it or selecting it from your device.
Supported formats include:
.srt (SubRip subtitle format)
.lrc (standard or enhanced with word timings)
.json (exported lyrics from this app)
If the file format is unsupported, the app will notify you so you can make adjustments. Once imported, your lyrics will appear in the editor, ready for further customization or video creation.
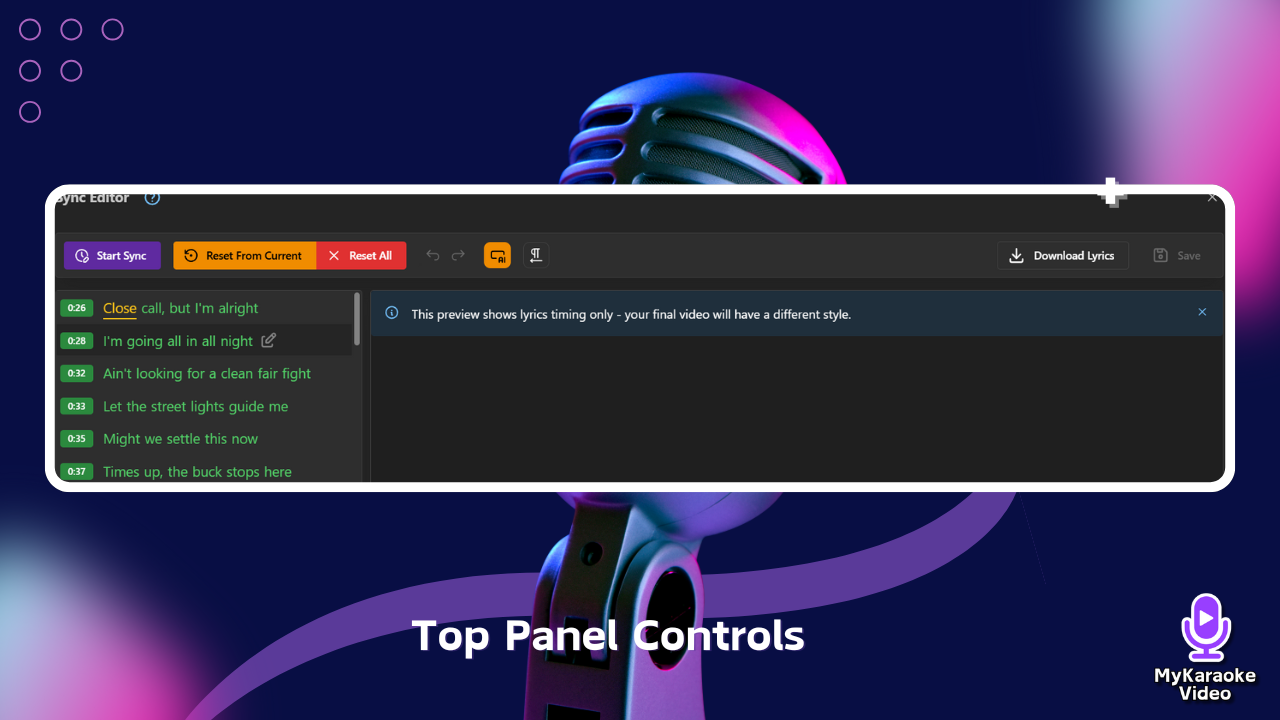
At the top of the screen, you'll find the menu bar with several essential functions:
Manual Sync: This button plays the audio file and allows you to manually sync lyrics by pressing the spacebar in time with each word as it's sung. This interactive synchronization method gives you precise control over timing.
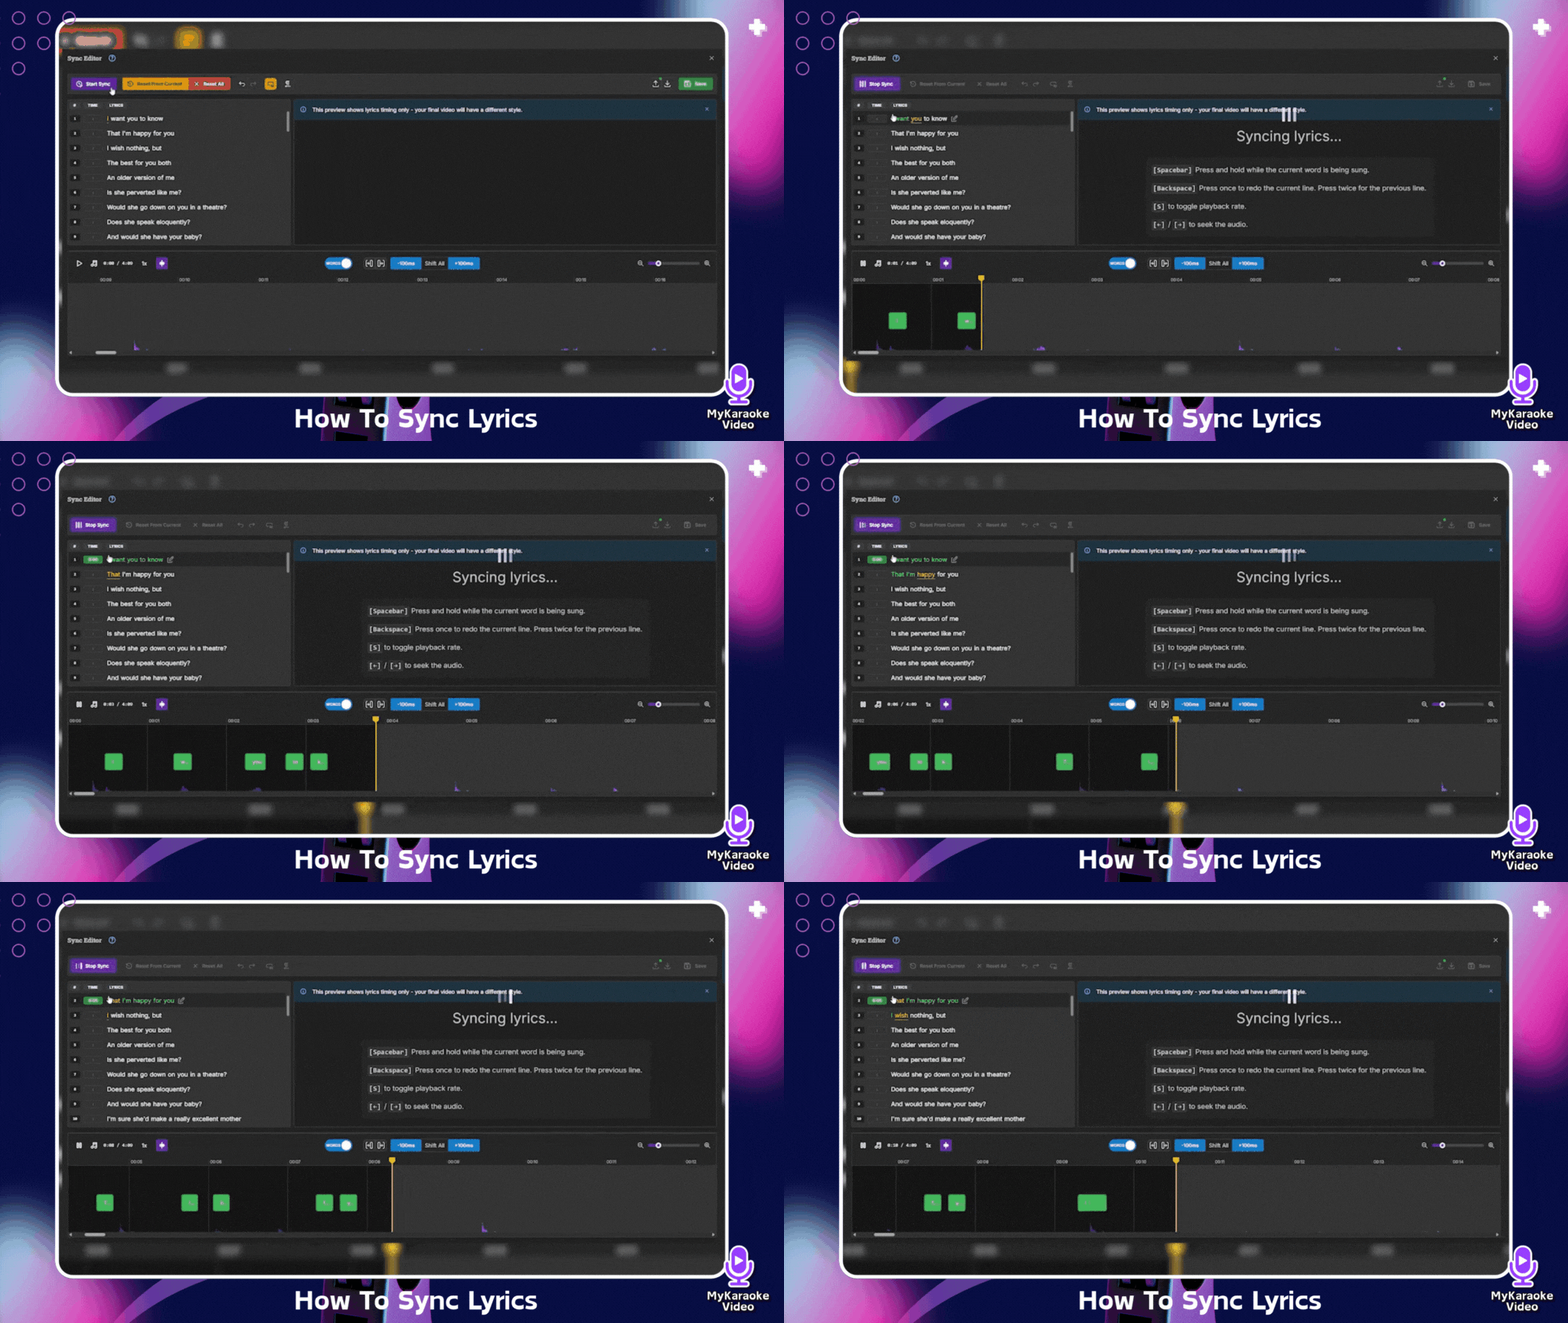
When Manual Sync mode is active, a "Manually syncing lyrics..." message appears in the center panel, along with a list of available keyboard shortcuts:
[Spacebar]: Press and hold while the current word is being sung

[Backspace]: Press once to redo the current line, press twice for the previous line
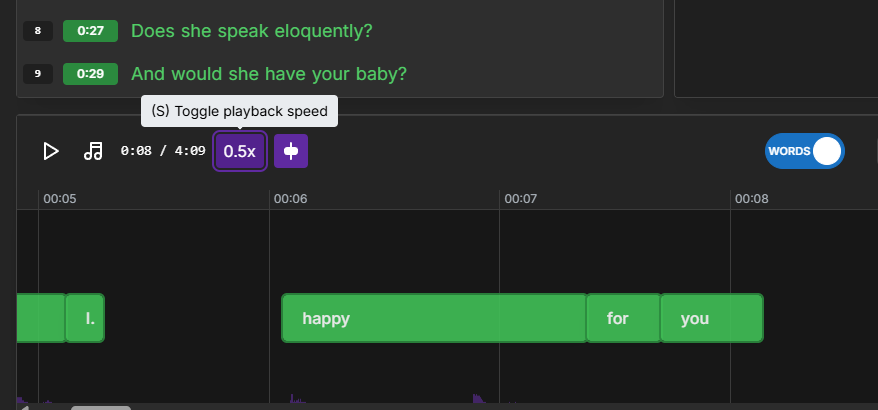
[S]: Toggle playback rate (switch between normal and slower speeds)
[←] / [→]: Seek through the audio (move backward or forward)
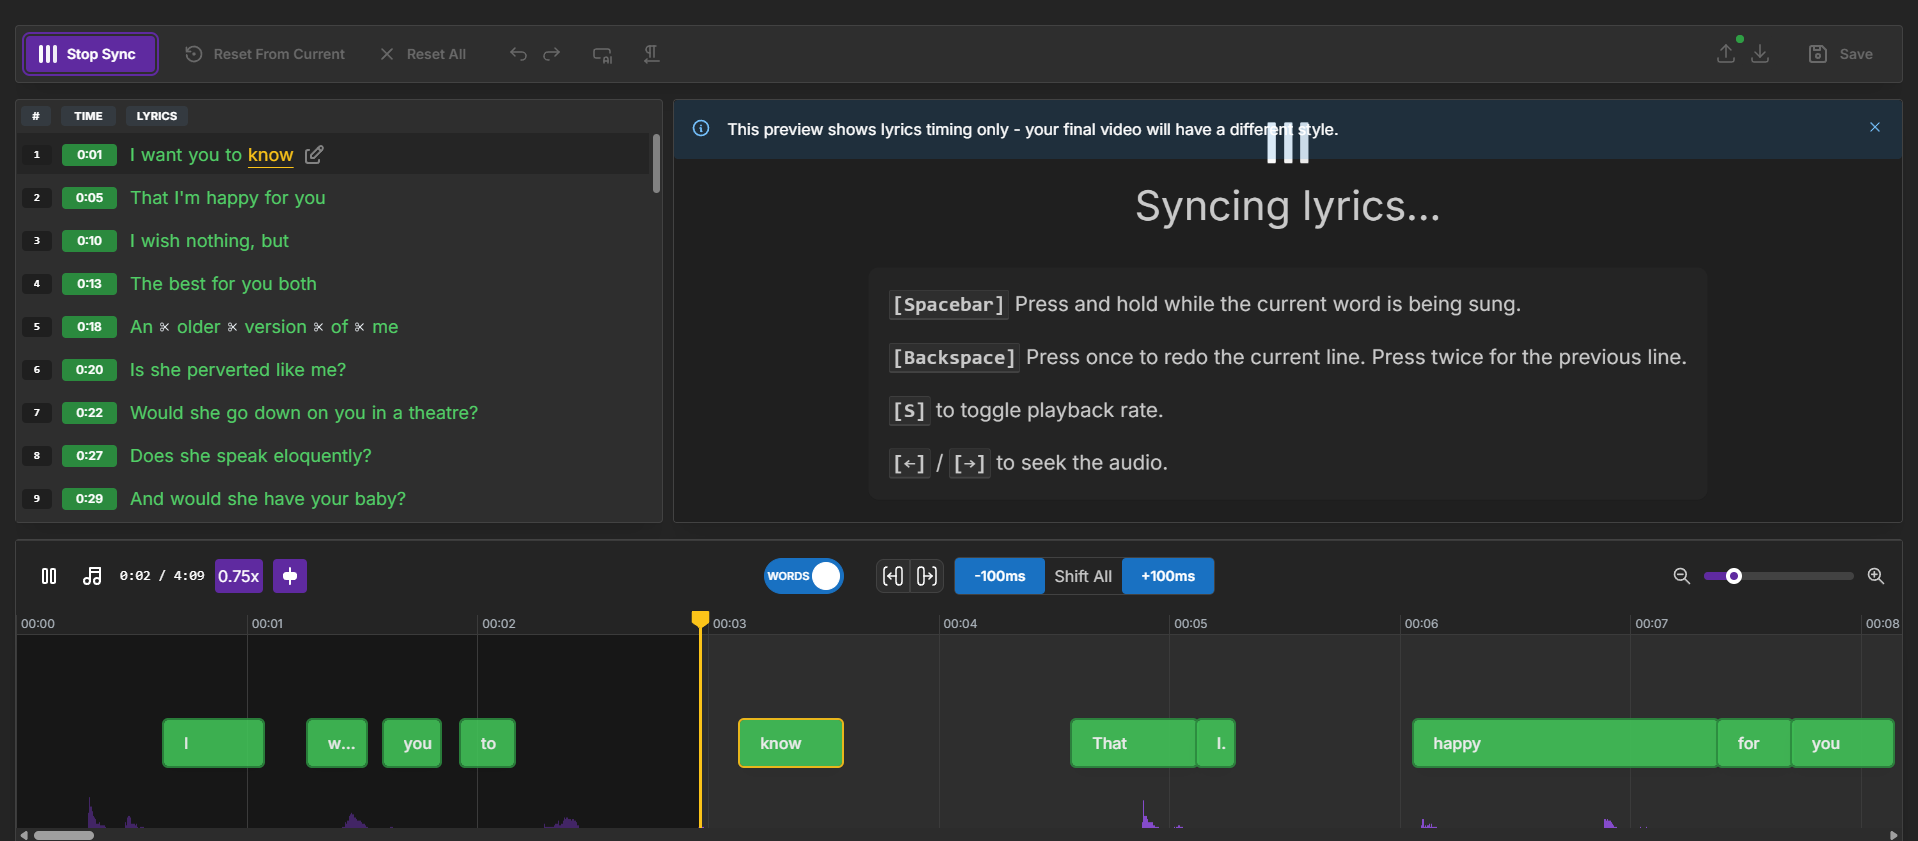
Reset From Current: Resets timing from your current position without affecting earlier parts of the song.
Reset All: Completely wipes all timing information and starts fresh.
Undo / Redo: Step back or forward through your recent changes.
Fix timing: Appears when your lyrics have timing issues. Click it to fix all of them automatically.
Edit all lyrics, Edit line breaks, Show voice assignments and Translations: Extra tools to edit the full lyrics text, set where lines break, see which singer each line is assigned to, and add translations.
Sync with AI: Let AI sync (or re-sync) all your lyrics automatically, using the Base or Pro engine. Use it when your lyrics aren't synced yet, when the timing is off throughout the song, or after you've added or changed lines and don't want to sync them by hand. It works from your project's vocals track and replaces the current timings, so run it first and fine-tune by hand afterwards.
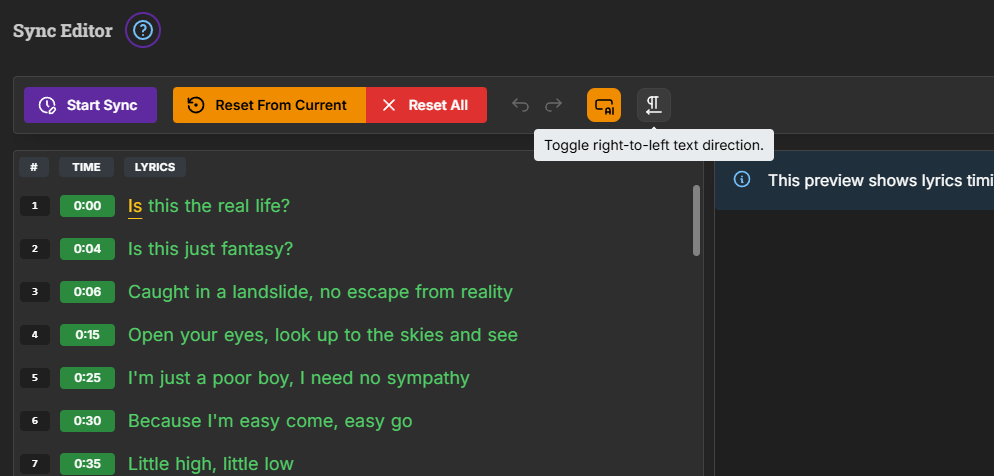
Text Direction Toggle (text-direction icon): This button allows you to toggle between left-to-right and right-to-left text direction. This is particularly useful when working with languages that are written from right to left, such as Arabic, Hebrew, or Farsi. When you hover over this icon, a tooltip appears saying "Toggle right-to-left text direction."
When you've finished your work, click the Save button to apply your synchronized lyrics to your karaoke video. The download icon only exports your lyrics as a file (SRT, LRC, Enhanced LRC or JSON), and isn't needed for your video.
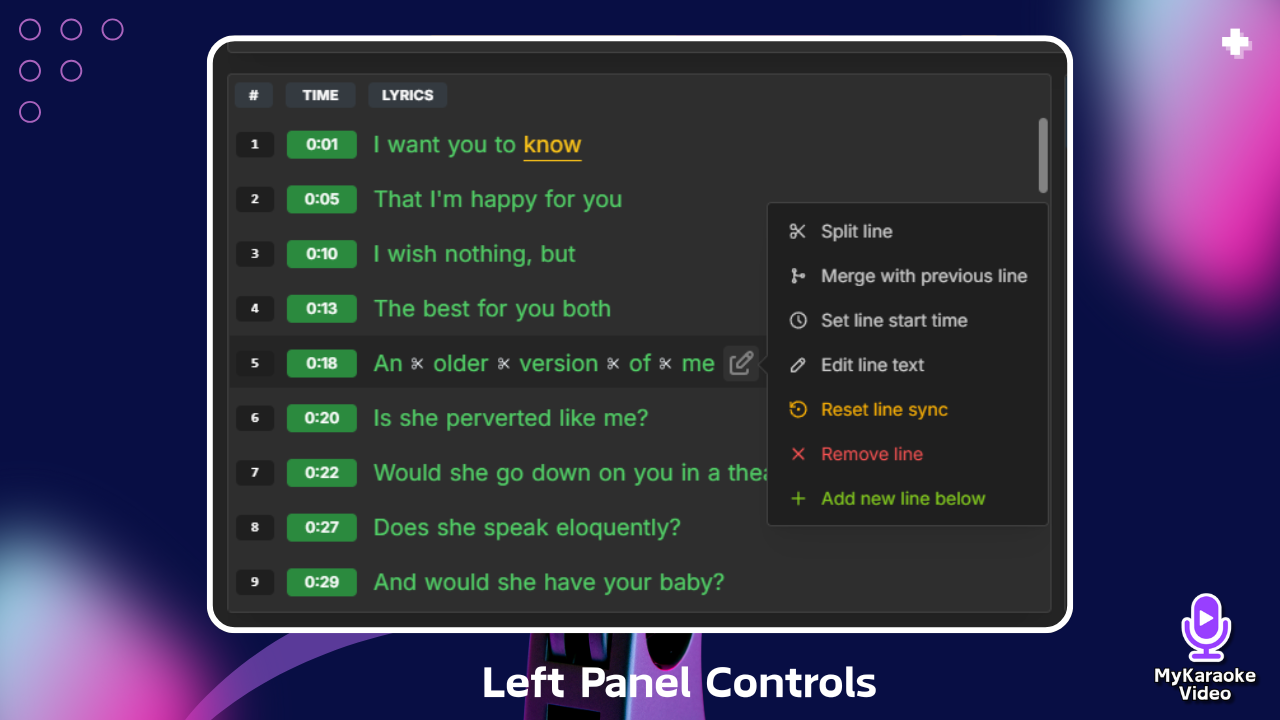
The left panel displays all your lyrics with timestamps (such as 0:26, 0:28, 0:32) next to each line. These timestamps indicate when each particular phrase will appear on screen. This panel is where you'll do most of your editing work.
When you hover your mouse over a line in the left panel, an edit icon appears. Click it to open a menu with several useful tools:
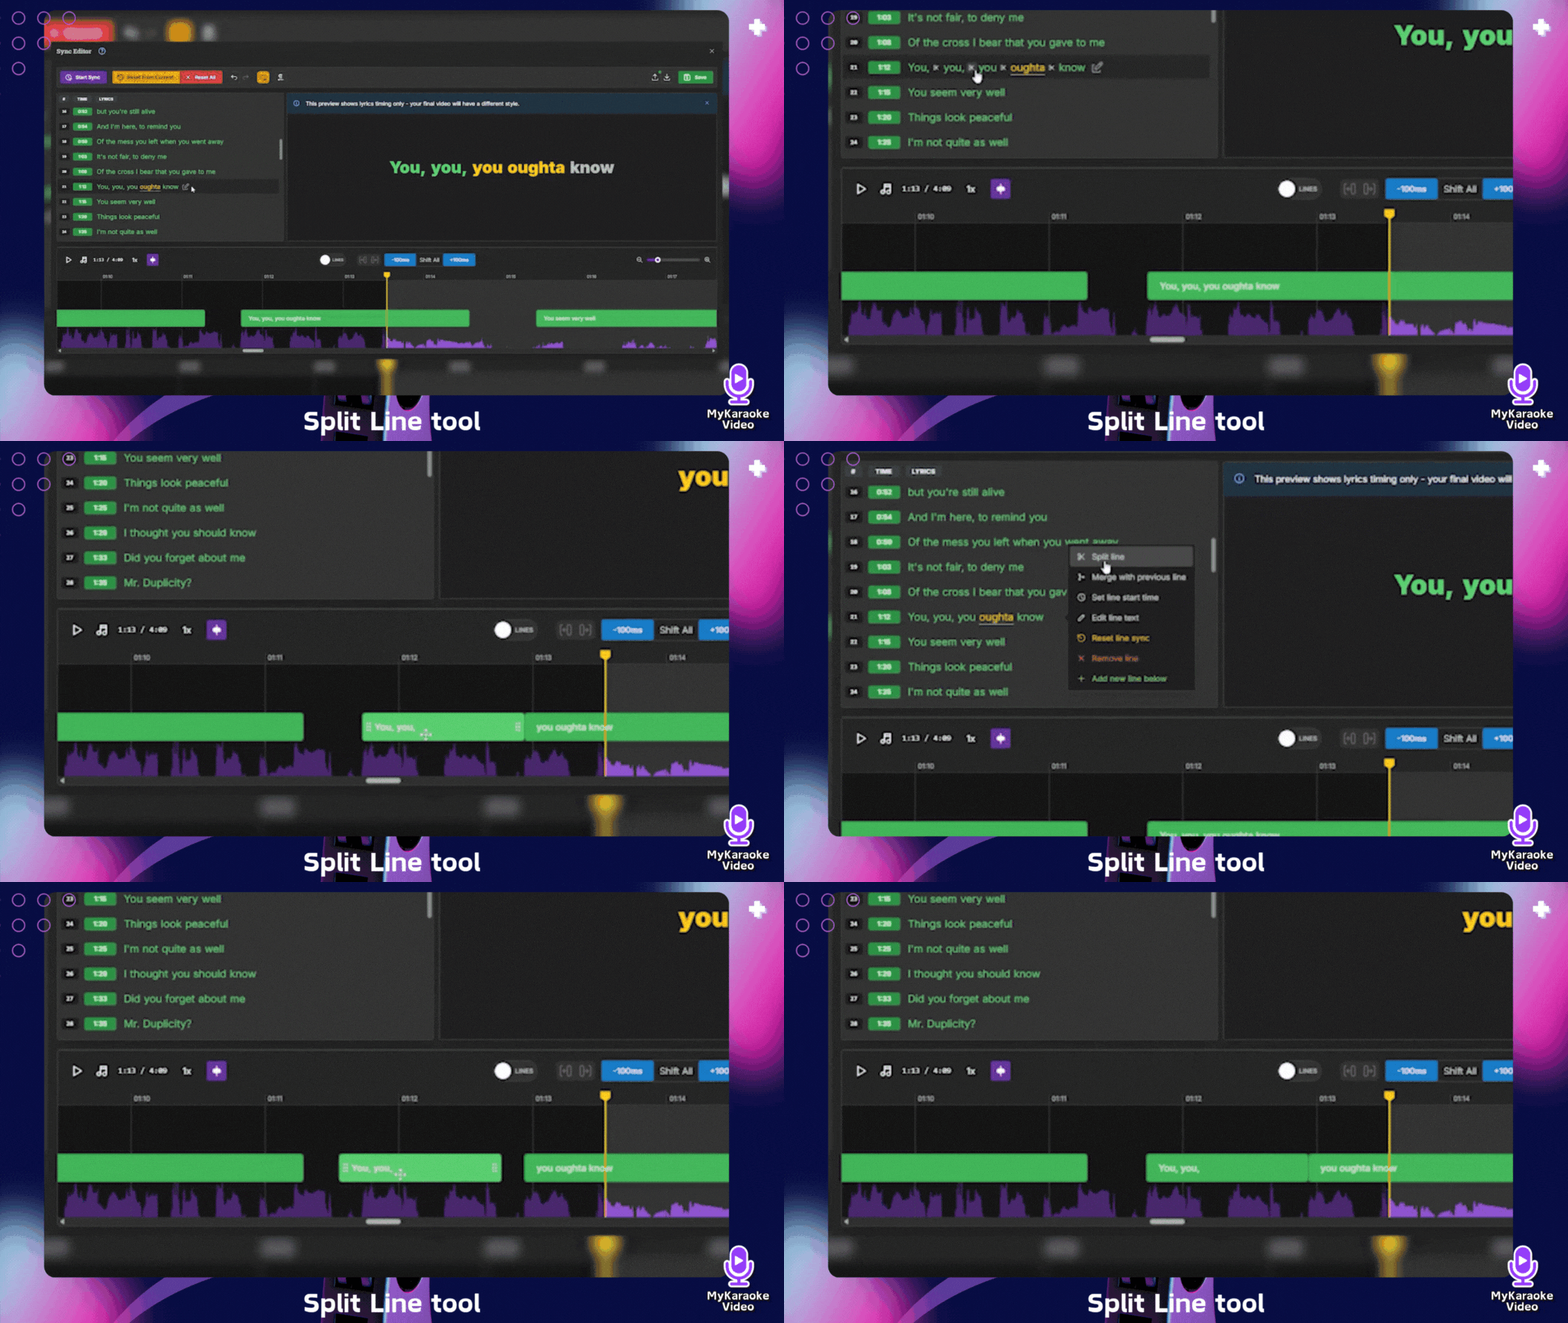
Split line (scissors icon): Breaks the line in two. After choosing it, small scissors markers (✂) appear between the words; click one to choose where the new line starts. To adjust the timing of each word separately, use WORDS mode in the waveform instead.
Merge with the previous line: Merges the selected text line with the previous one
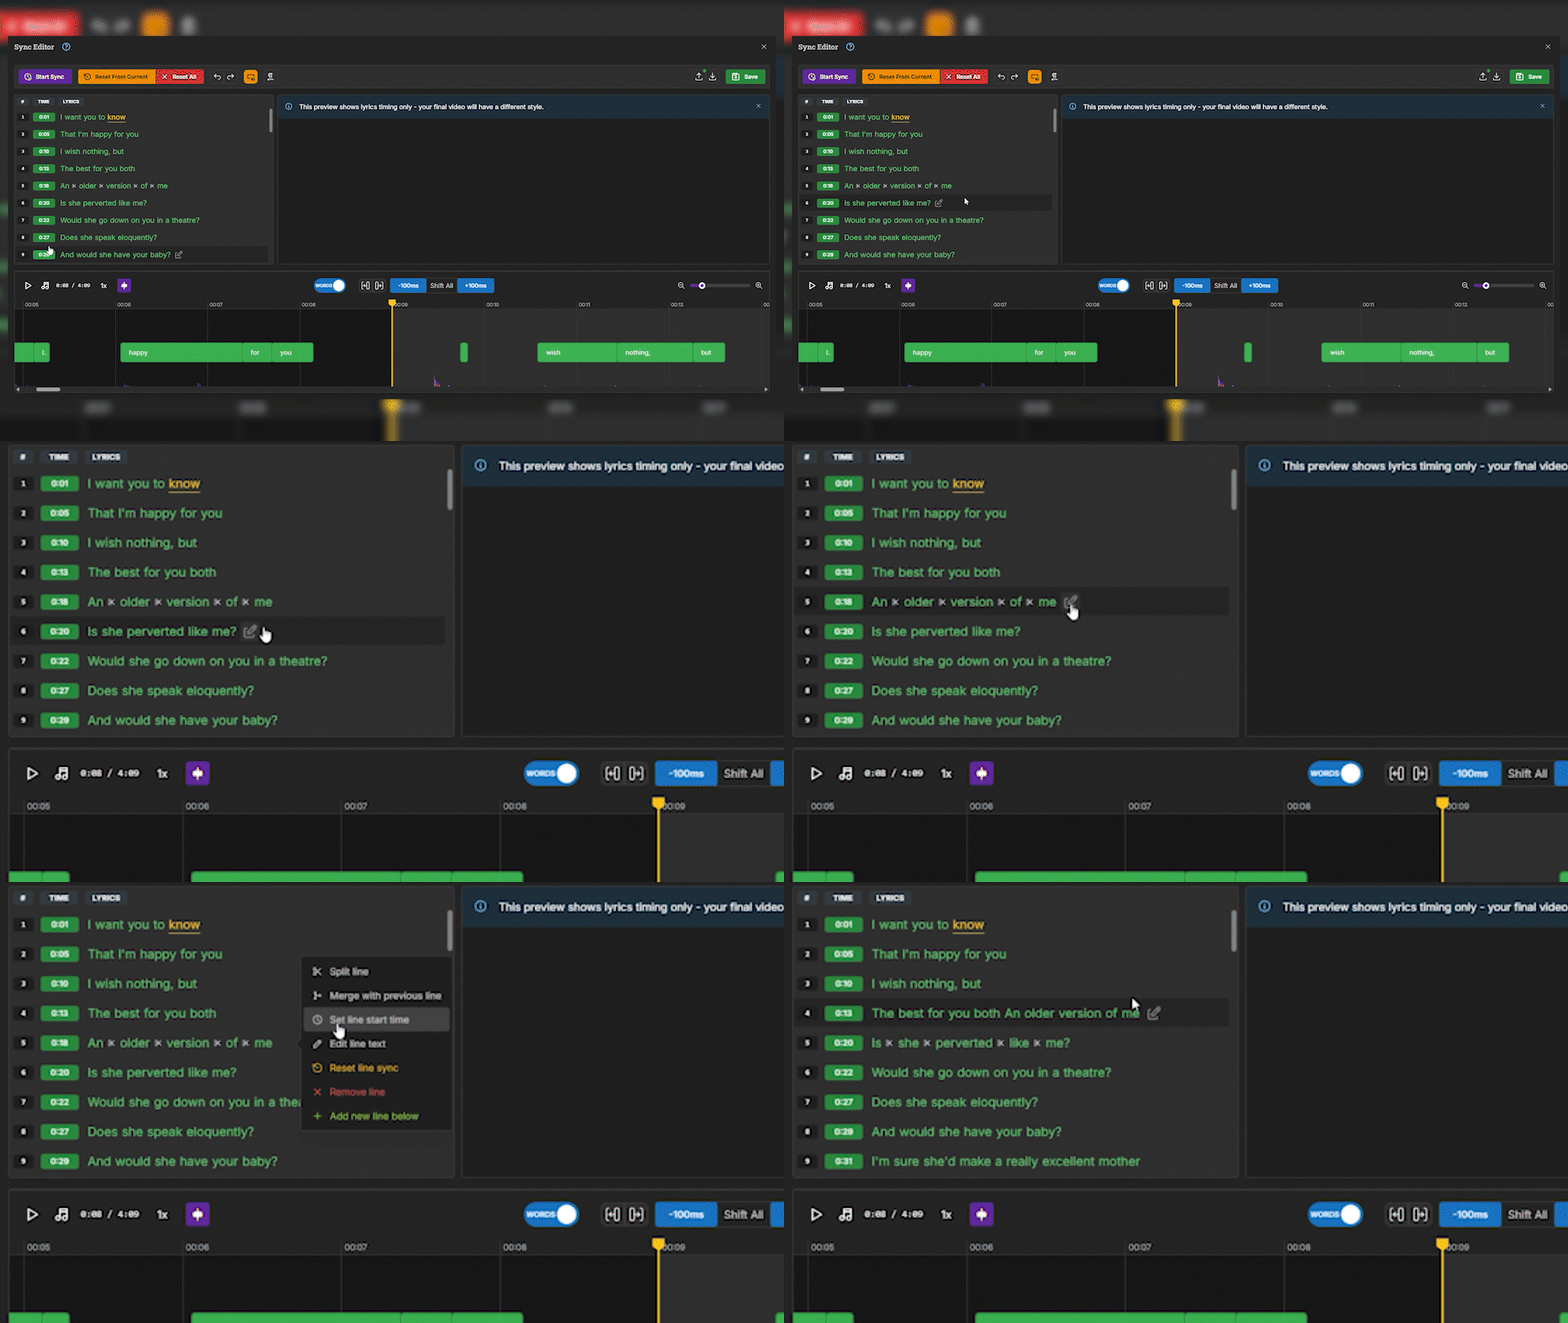
Set line start time (clock icon): When clicked, a pop-up appears where you can manually enter the exact minute and second when this line should start. This is particularly useful when you know precisely when a line should appear. After entering the time, click the green checkmark to confirm your change.
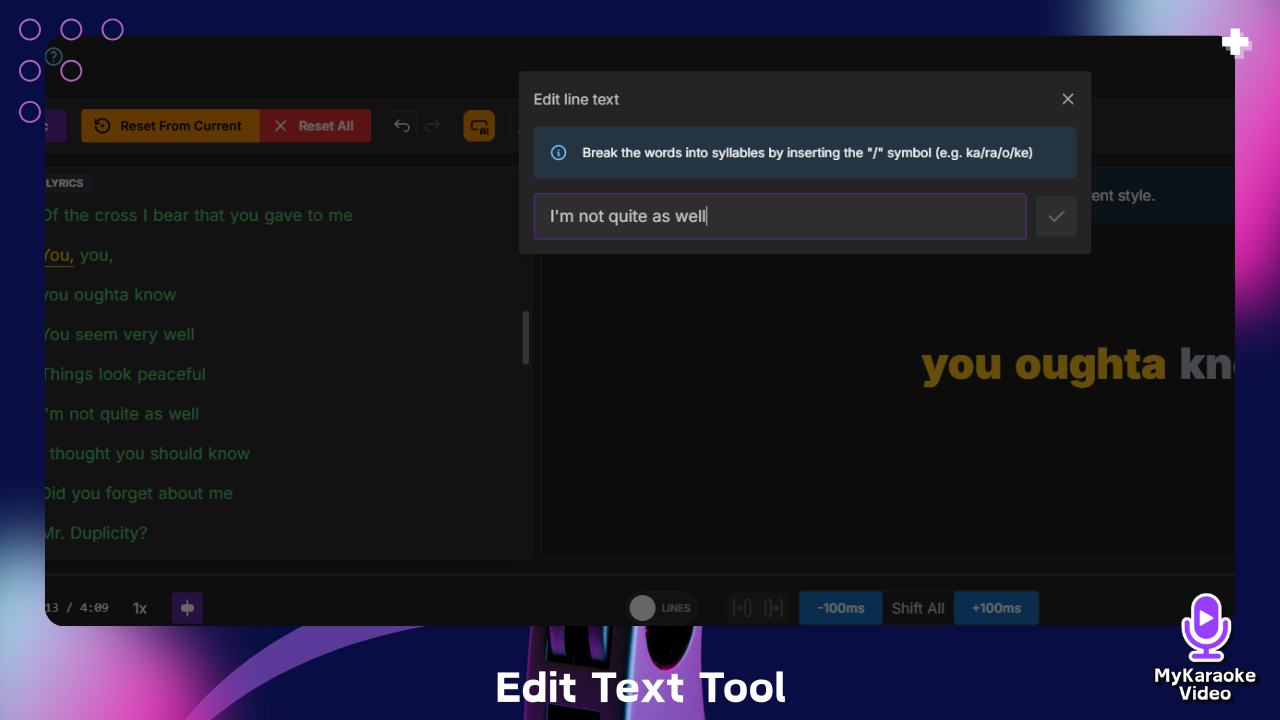
Edit line text (pencil icon): Clicking this opens a text editing pop-up where you can modify the entire line's text. This is useful for correcting multiple words at once or completely rewriting a line. It will also allow you to break the words into syllables by inserting the “/” icon. Click the green checkmark when you're finished to save your changes.
Reset line sync (circular arrow icon): This resets the timing for the selected line. When clicked, you can use the Manual Sync button to re-time just this specific line without affecting the rest of the song.
Remove line (X icon): Removes the selected line completely from your lyrics.
Add new line above / Add new line below (+ icon): Adds a new line immediately before or after the current one. This is helpful when you need to insert missing lyrics between existing lines.
These editing tools provide granular control over your lyrics, allowing you to make precise adjustments to timing and content as needed for perfect synchronization.
Instead of editing lines one by one, you can select several lines and apply the same change to all of them.
Select lines: Hover over a line number in the left panel; it turns into a checkbox. Click it to select that line. Once any line is selected, every line number shows as a checkbox. On touch screens the checkboxes are always visible.
Select a range: Hold Shift and click another line number to select every line in between.
Select or unselect everything: Use the checkbox at the top of the list. Click × (Clear selection) to clear your selection.
When lines are selected, a bar shows how many are selected and offers these actions:
Set to voice 1 / Set to both voices / Set to voice 2: Assigns the selected lines to a singer for Duet mode. These buttons appear when Show voice assignments is turned on.
Shift timing: Moves the selected lines earlier or later. Enter a value in seconds in the Shift by field (negative moves the lines earlier, positive later) and click Apply. This is only available when at least one selected line is already synced.
Reset sync: Clears the timing of the selected lines so you can sync them again. You'll be asked to confirm.
Remove lines: Deletes the selected lines. You'll be asked to confirm. If your project has translations, they may become misaligned, so review them in the Translation Editor afterwards.
You can undo any of these actions with Ctrl / ⌘ + Z.
The preview player on the right will let you visualize the sync in real time.
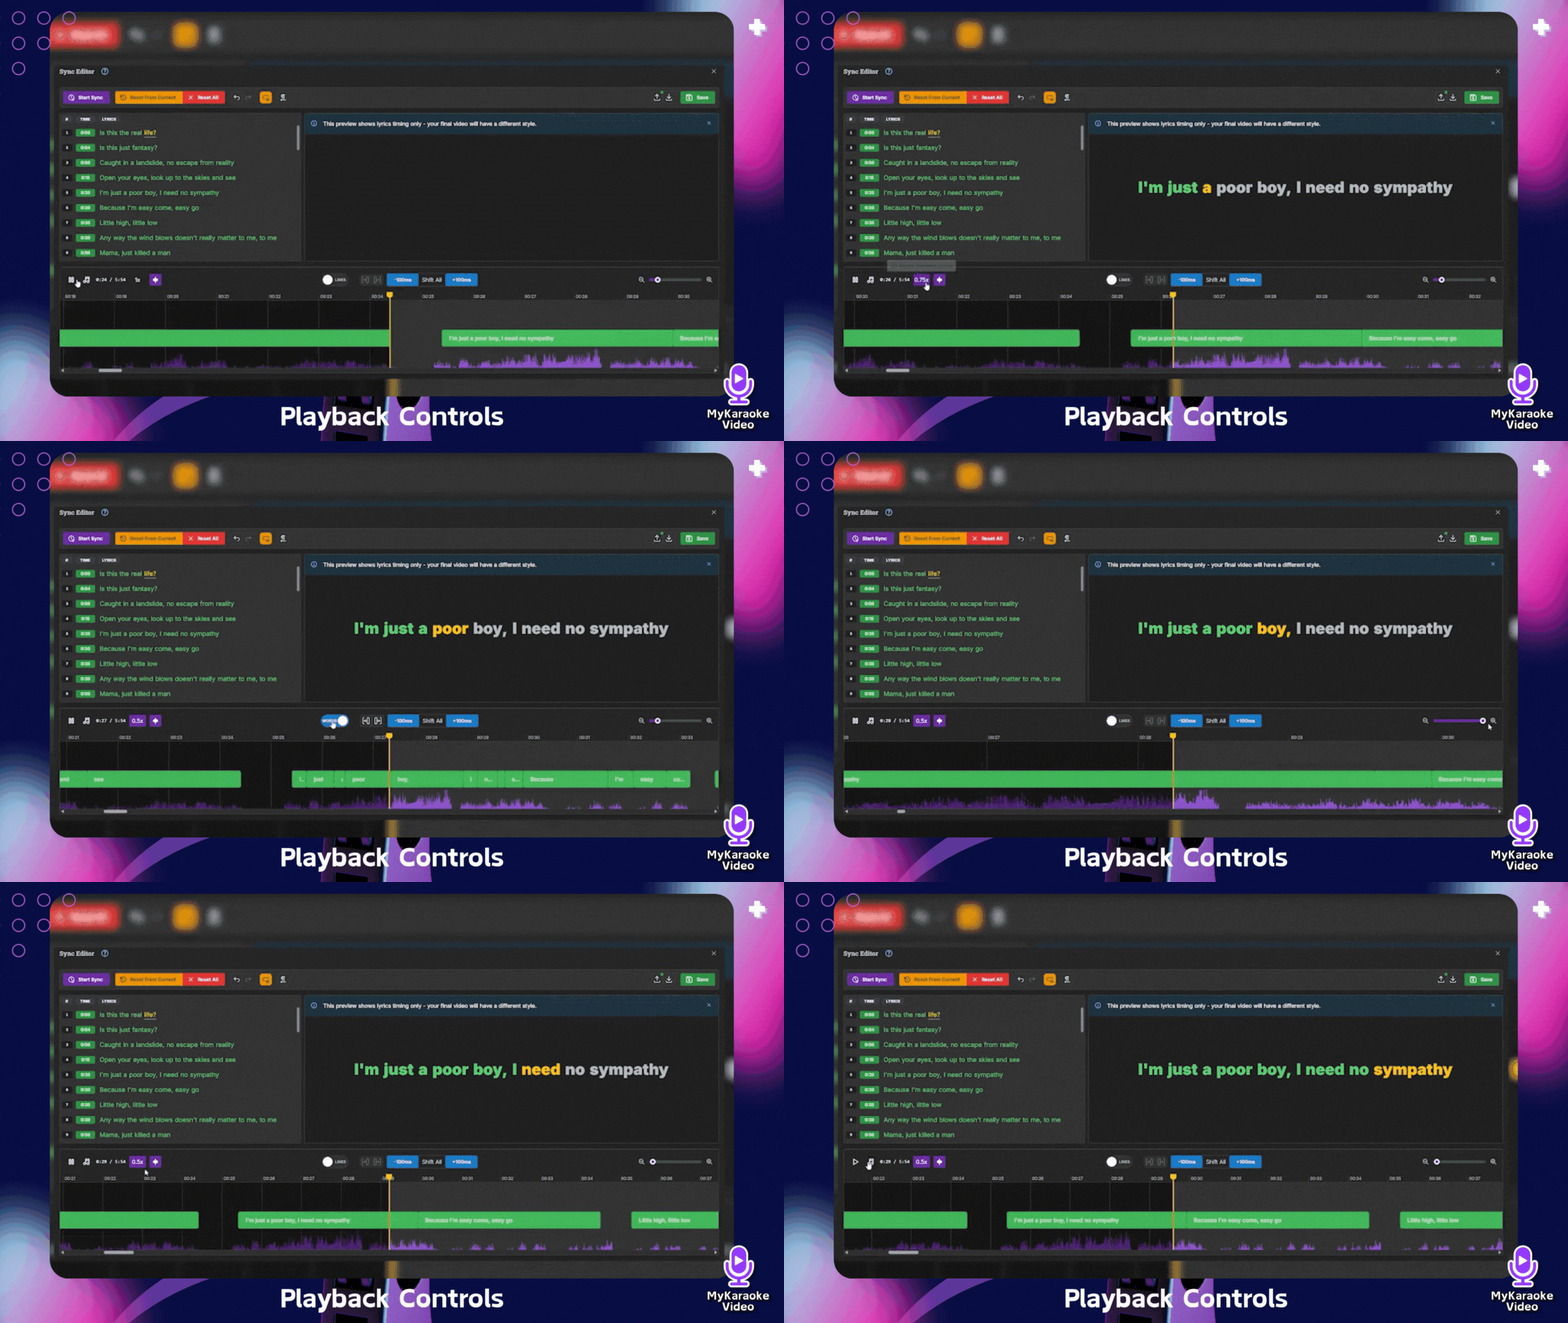
The bottom section of the Lyrics Editor contains the timeline and playback controls, which are essential for navigating through your song and making precise timing adjustments.
On the bottom left, you'll find several important controls:
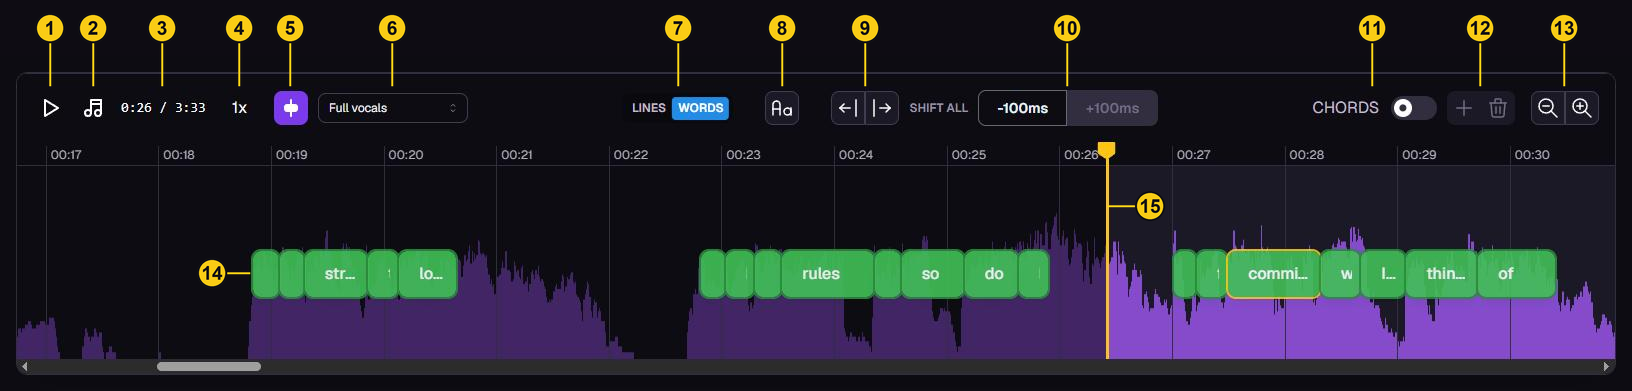
(1) Play/Pause Button: Click to start or stop playback of your song. You can also use the spacebar as a shortcut to toggle between play and pause.
(2) Music Note Button: This toggles the instrumental track on or off. When you want to focus only on the vocals, click this button to mute the instrumental parts of the song.
(3) Time Display: Shows the current playback position and total song length in minutes and seconds (e.g., 0:28/2:16).
(4) Playback Speed Toggle (1x, 0.75x and 0.5x): Click it to cycle through the speeds, or press S. Slower speeds are invaluable for making precise edits - they give you more time to react and place lyrics accurately.
(9) Shift a single line: Select a line and use the per-line shift buttons to move it 100ms earlier or later, or press Shift+← / Shift+→.
(10) Shift All: Located in the center of the bottom toolbar, this is your go-to tool for making broad timing adjustments across your entire song. This lets you move all your lyrics forward or backward by +100ms or -100ms. This is great for making broad timing adjustments. For example, what if the song you imported has all the lyrics misaligned by just a bit? In that case, you'll want to use the "Shift All" button to adjust everything at once, saving you from having to edit each word individually.
The center of the bottom panel contains the audio waveform and navigation tools:
(14) Waveform: The visual representation of the audio that shows the amplitude of sound throughout the song. You can click anywhere on this waveform to jump to that point in the song. Note that by default the waveform displays the vocals - during instrumental sections like guitar solos or instrumental breaks, the waveform may appear less pronounced or empty, even though the audio will still play through these sections. You can change this with the Waveform source selector (6) (Full vocals, Lead vocals, Backing vocals or Instrumental).
(15) Playhead: The vertical yellow line showing your current position in the timeline. Click or drag on the waveform to move it through the song.
On the right side of the timeline, you'll find tools for adjusting your view:
(13) Zoom Buttons: The Zoom in and Zoom out buttons let you zoom in or out on the waveform, making it easier to see details or get a broader view of the song. You can also hold Ctrl (Cmd on Mac) and use your mouse wheel while hovering the waveform to zoom in/out. The mouse wheel on its own scrolls through the song.
(7) Words/Lines Toggle:
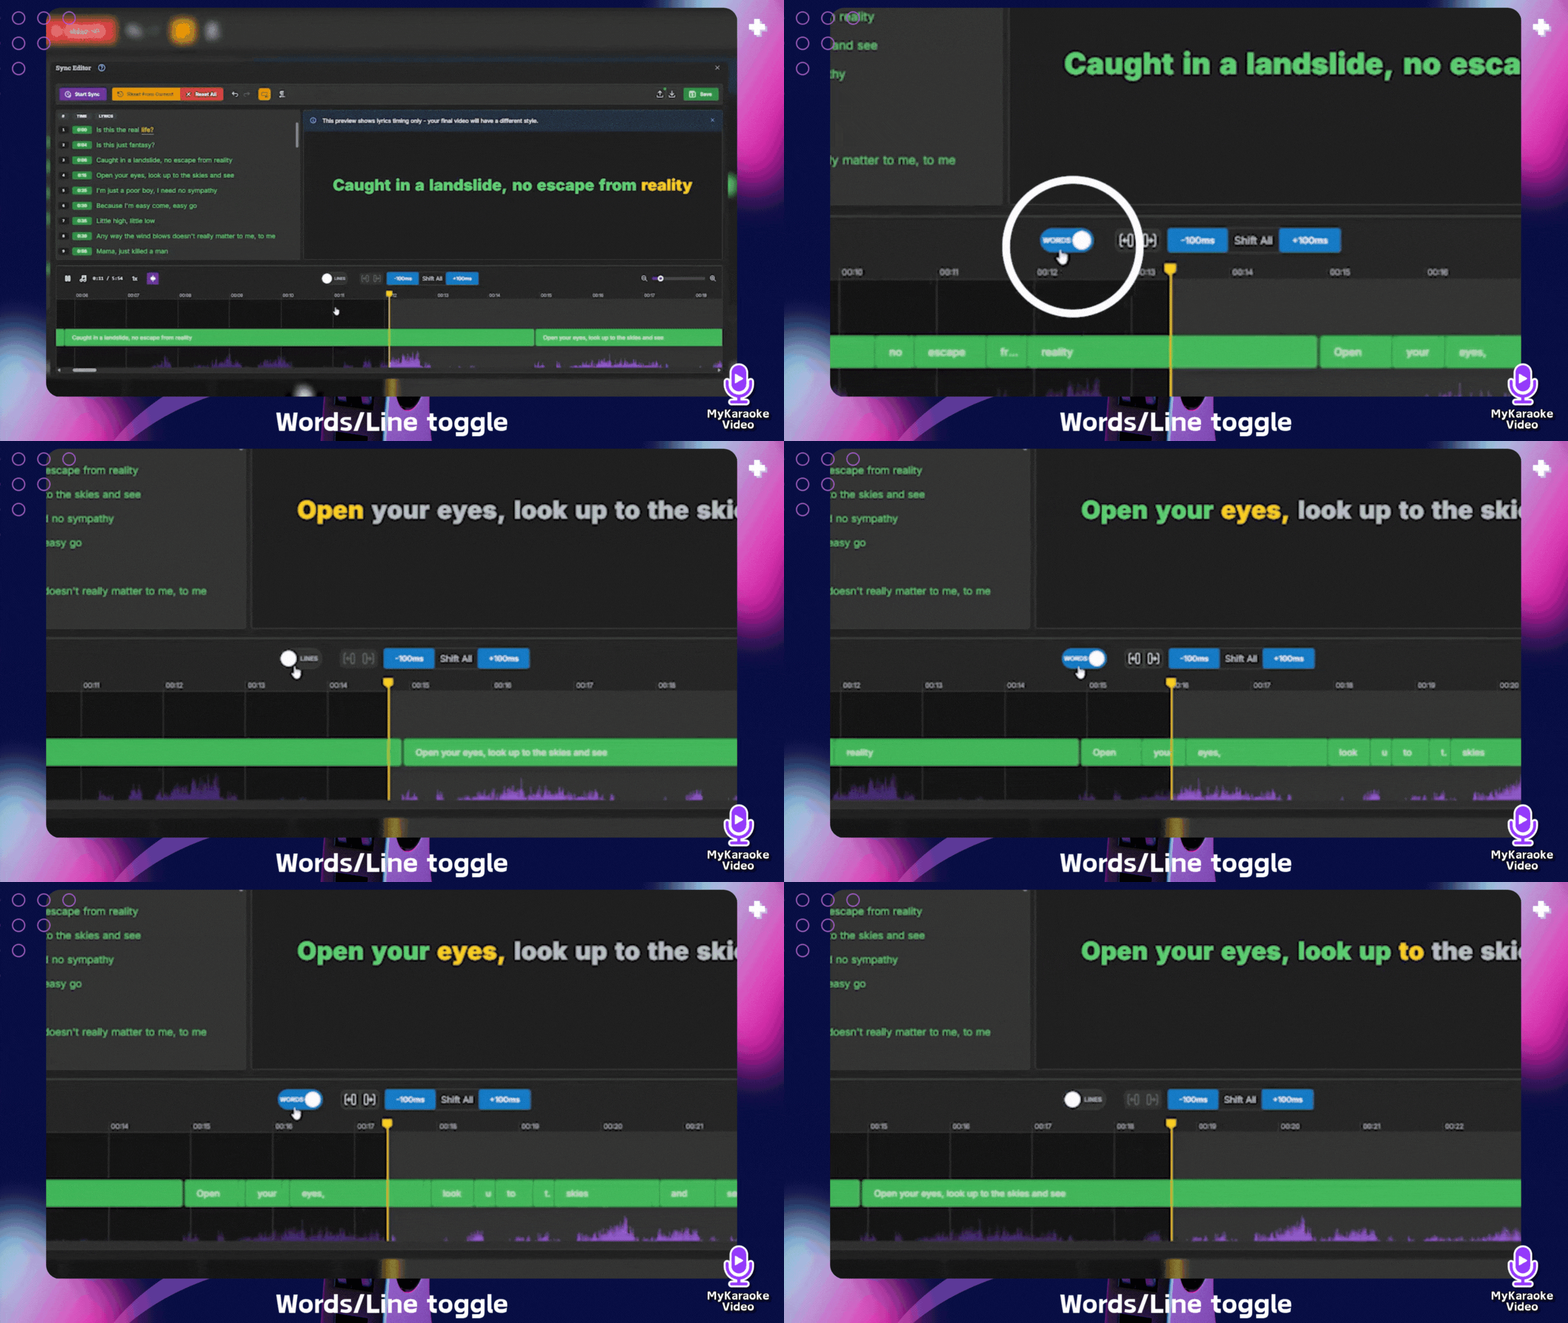
This button switches between two view modes:
Words Mode: Shows individual words separated in the waveform, allowing you to adjust the timing of each word independently. When selected, it appears as "WORDS" with a blue background.
Lines Mode: Shows entire lines or phrases in the waveform, which is useful for working with complete sentences. When selected, it appears as "LINES" with a gray background.
(8) Word actions menu: In Words mode, select a word and click the word actions button (the Aa icon) in the timeline toolbar. You can also right-click a word on the waveform or in the lyrics list to open the same menu. The menu is turned off while syncing, in Lines mode, or when no word is selected. Its actions come in three groups:
Cut, copy and paste: Cut selected words, Copy selected words and Paste words at playhead move or duplicate words with their text, syllables, durations and gaps. Paste places the words at the playhead.
Playhead actions: Add word at playhead opens a dialog for the new word, then inserts it at the playhead. Set word start to playhead and Set word end to playhead move one edge of the selected word to the playhead and keep the other edge. These actions need the audio to be loaded, and the Set actions need a single word selected.
Snap and delete: Snap selected word to previous word aligns the selected word with the end of the previous word, and Snap selected word to next word aligns it with the start of the following word. Delete selected words removes the selected words, and removes a line if all its words are deleted.
Every action can be undone in one step.
(5) Auto-center cursor: Keeps the playhead centered in the view while the song plays.
(11, 12) Chords: Shows the chord lane, where you can add chords at the playhead and delete selected ones.
The timeline is color-coded to make visualization easier:
Green highlighted areas represent words or lines that are currently active and synchronized
Gray in the waveform represents the portion of the audio that has already played (before your current cursor position)
Purple in the waveform represents the portion of the audio that is yet to play (after your current cursor position)
This detailed timeline allows you to visualize exactly how your lyrics will appear in relation to the audio, making it much easier to create professional-quality synchronization.

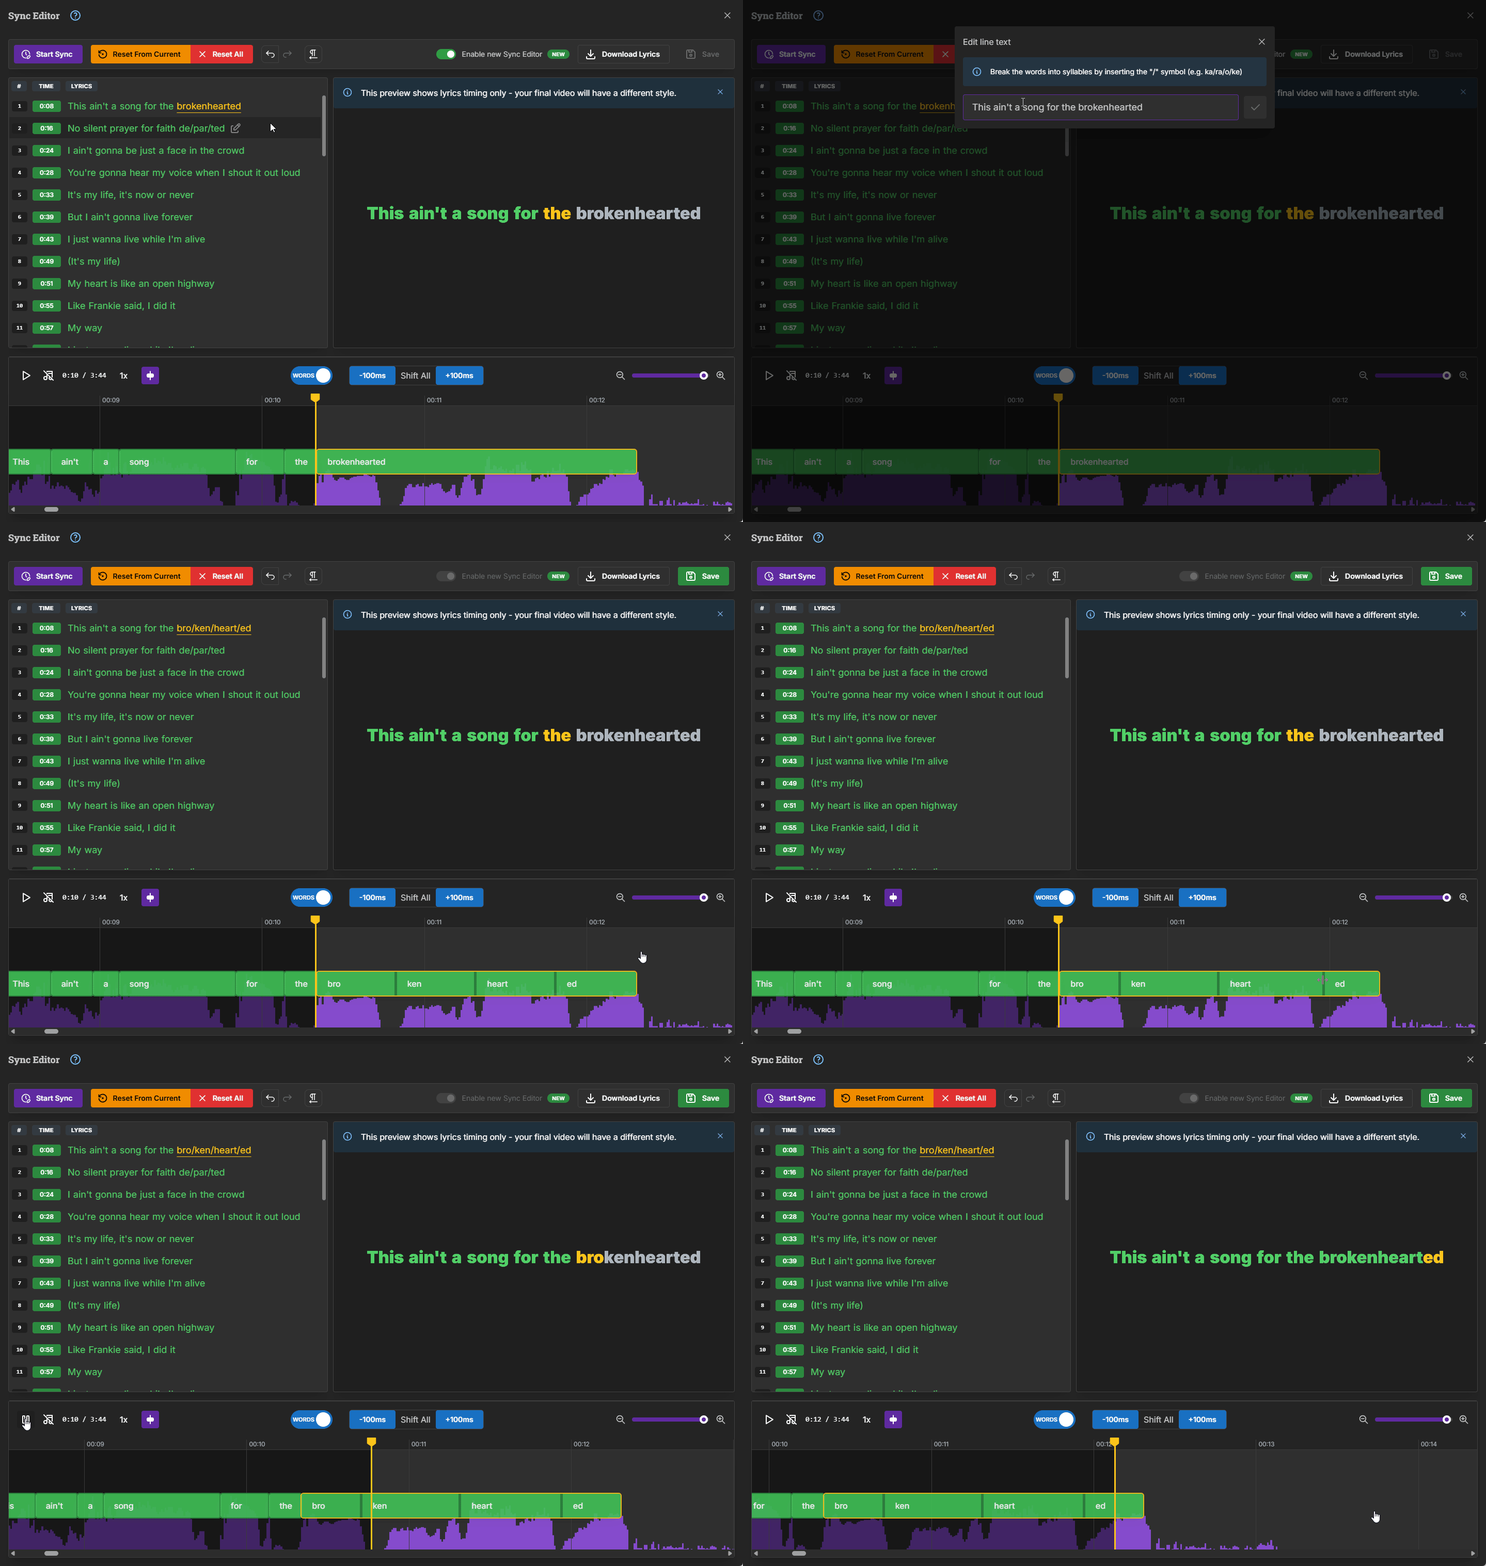
The Syllable Timing feature allows you to split words into syllables, ensuring that only the part of the word being sung is highlighted. This is particularly useful for songs where words are sung in parts. Learn how to do it on the article below:
Adding syllable-level timings to your lyrics
This guide explains how to break the words into syllables and adjust their timing to achieve a perfect sync.
With the tools and techniques covered in this guide, you now have everything you need to create professionally synchronized karaoke tracks using the Lyrics Editor. Remember that practice makes perfect - the more songs you work with, the faster and more efficient you'll become at spotting and fixing sync issues. Don't be afraid to experiment with different approaches depending on the specific challenges each song presents. Whether you're making minor timing adjustments or completely re-syncing a complex song, the Lyrics Editor provides the precision tools you need for perfect results. Now it's time to put your knowledge into action and create karaoke tracks that singers will love to perform!
