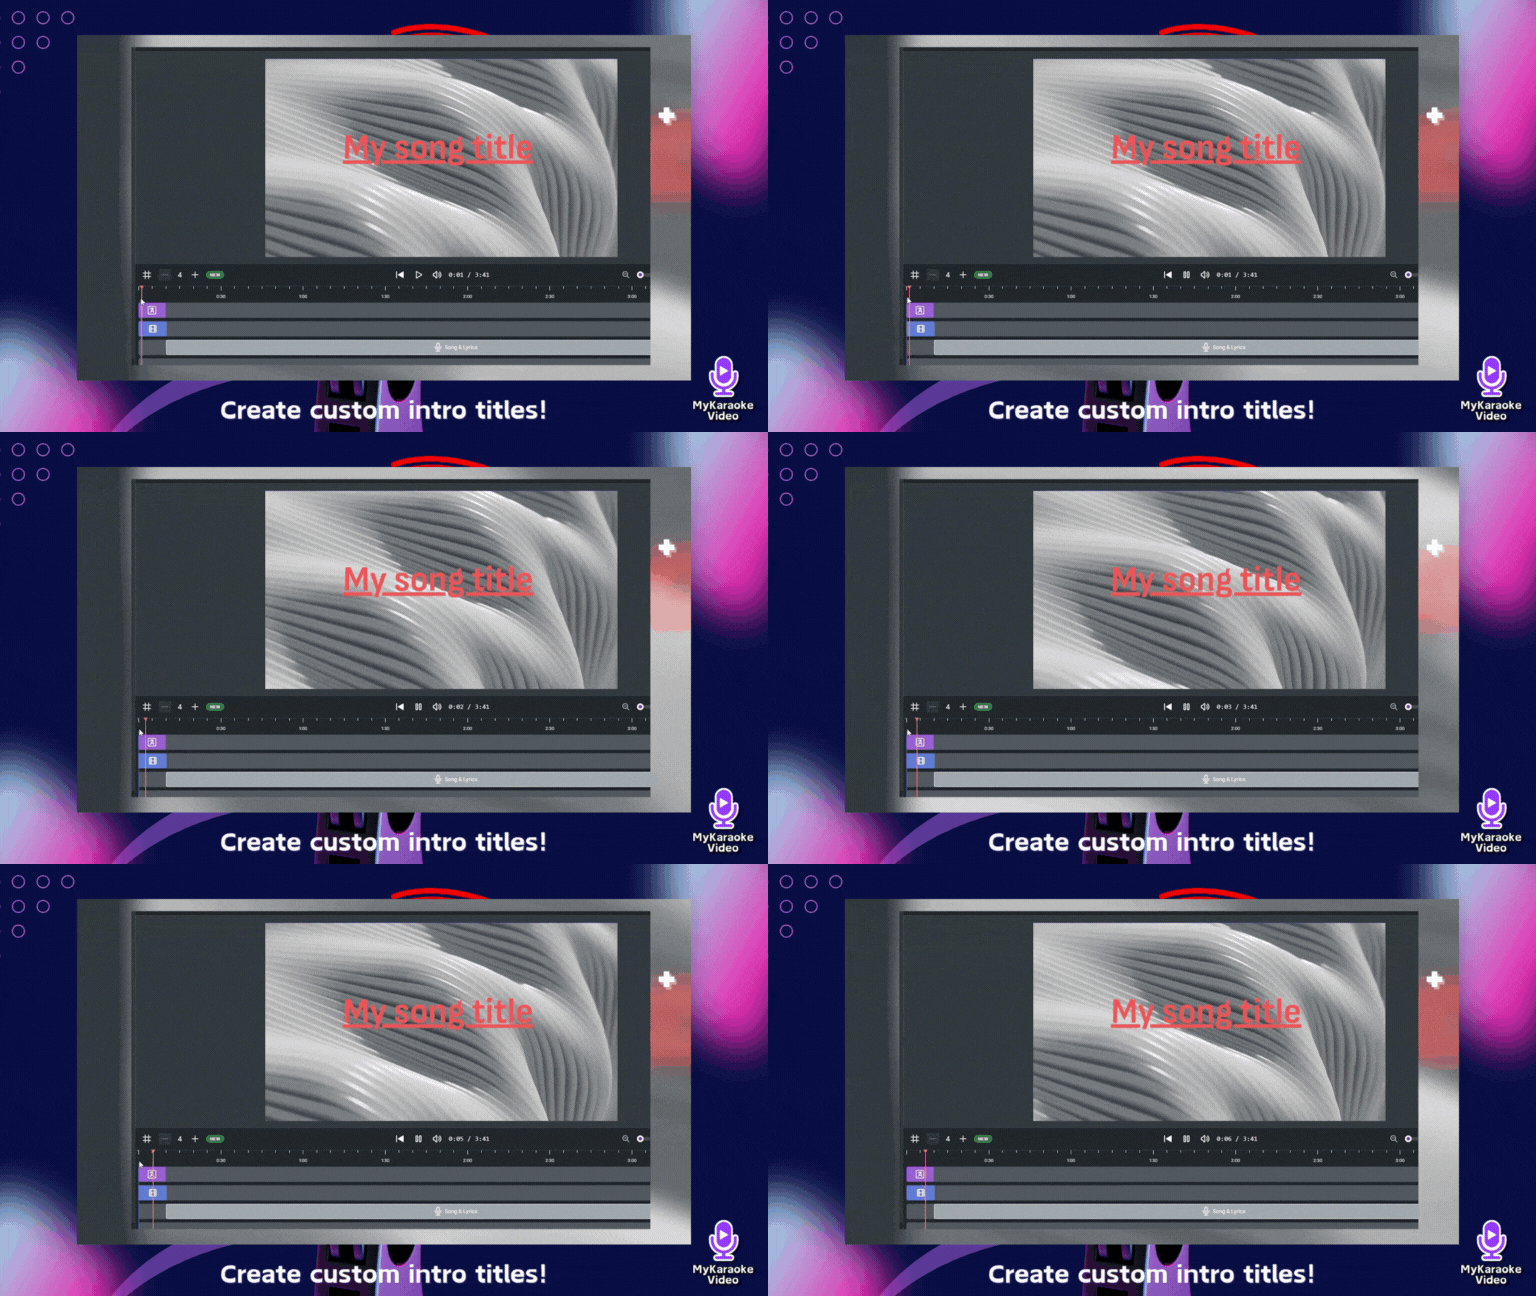
An intro title screen is a great way to personalize your karaoke or lyric video by displaying information like the song title, artist name, or a custom message before the lyrics begin. This guide walks you through the process of adding a professional-looking intro screen to your karaoke video.

In the Advanced Editor, locate the Song & Lyrics element in the timeline at the bottom
Click and drag this block to the right to create space for your intro title
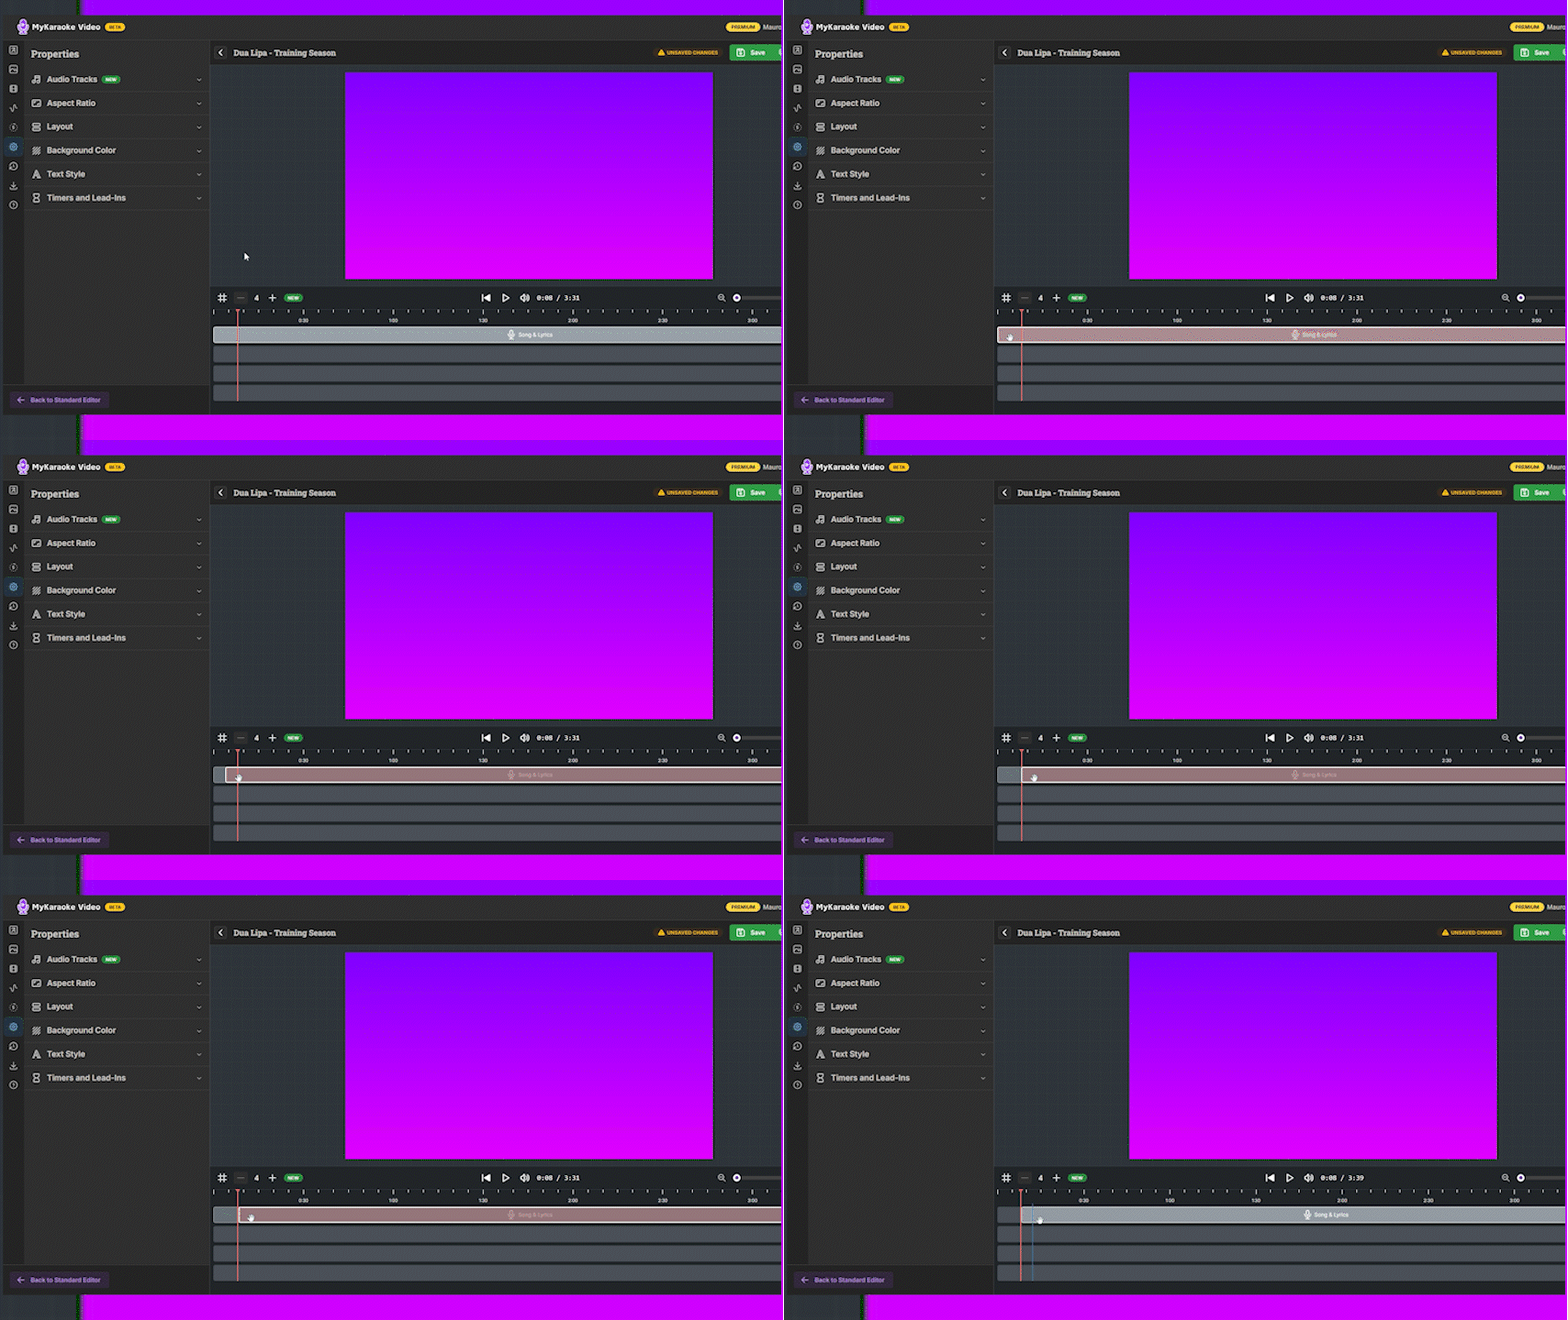
The amount you move it determines how long your intro screen will display
For example, dragging it 5 seconds to the right will give you a 5-second intro
On the left sidebar of the Advanced Editor, locate and click on the "Text" menu option
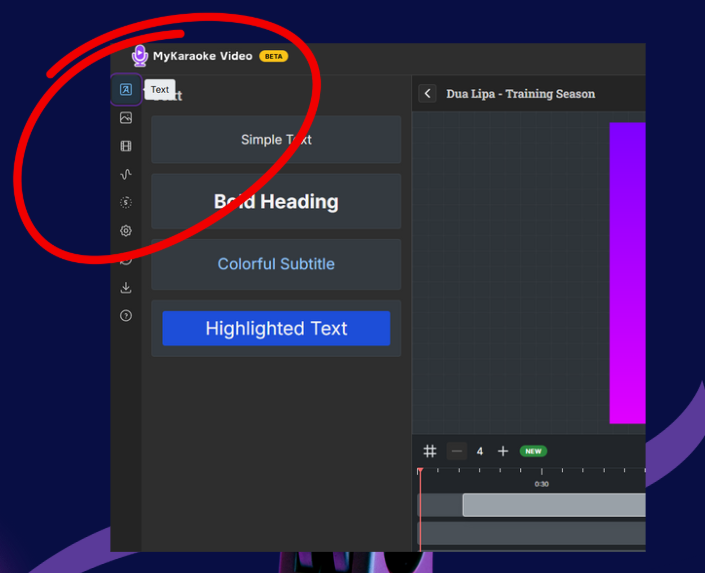
After clicking on the Text menu, you'll see four text style options:
Simple Text: Basic text styling
Bold Heading: Large, prominent text ideal for titles
Colorful Subtitle: Styled text with color emphasis
Highlighted Text: Text with background highlighting
For creating an intro title screen, click on "Bold Heading" (or your preferred style)
After selecting a text style, a purple text block with an "A" icon will appear on the timeline
Click and drag this block to position when your title should appear
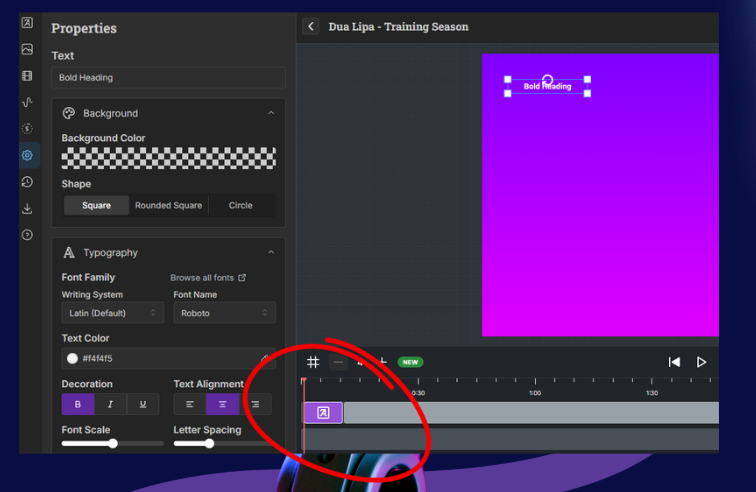
To adjust the duration:
Hover your cursor over either edge of the purple block
When the cursor changes to a double-arrow (↔) symbol
Click and drag to extend or shorten the duration of your title screen
The width of the block represents how long your title will appear
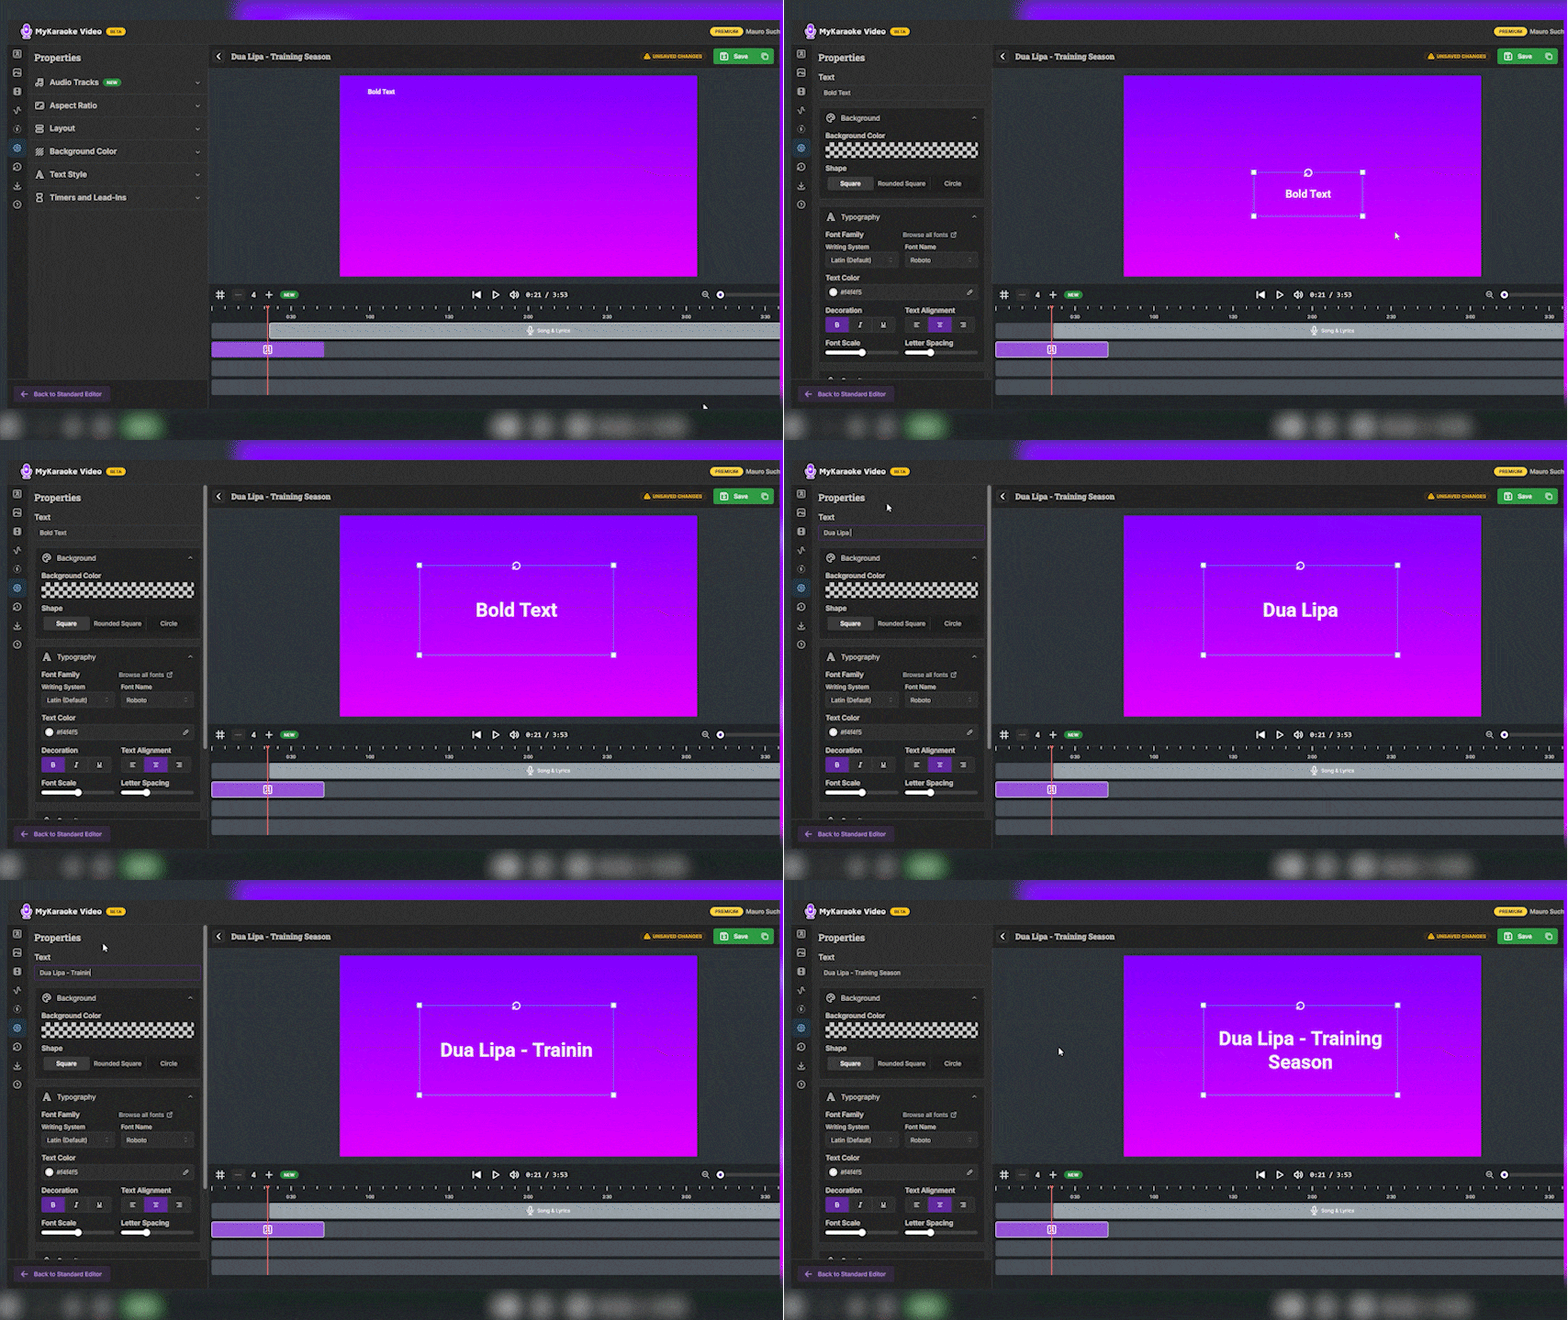
Click on the block with the “A” icon, it will display the Text Properties
Type your desired title text (song name, artist, etc.)
Notice the white square handles that appear around your text:
Click and drag these handles to resize your text
The corner handles resize proportionally
The side handles allow for stretching horizontally or vertically
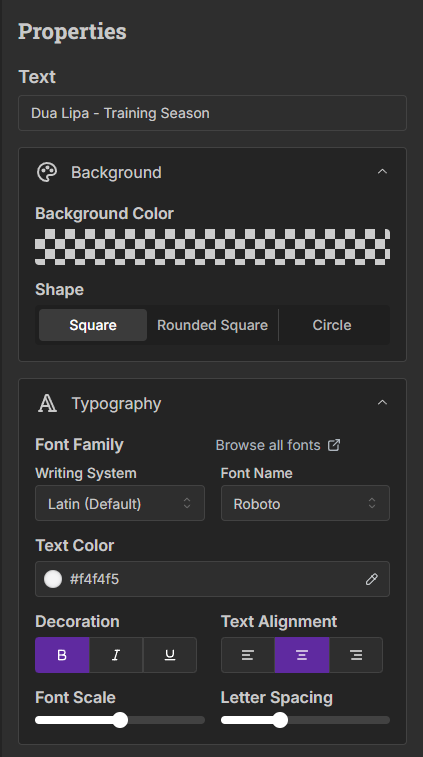
With your text selected, use the Properties panel on the left to customize:
Edit the text in the input field at the top of the properties panel
Background Color: Choose a background color for your text (leave unchanged for transparent)
Shape: Select from Square, Rounded Square, or Circle options
Writing System: Select your preferred writing system (e.g., Latin)
Font Name: Choose from available fonts (e.g., Roboto)
Text Color: Click the color box to select a color for your text
Decoration: Apply Bold (B), Italic (I), or Underline (U) formatting
Text Alignment: Choose left, center, or right alignment
Font Scale: Adjust the slider to change text size
Letter Spacing: Adjust the slider to change spacing between letters
Expand the Opacity menu
Adjust the slider to control how transparent your text appears
100% is fully opaque, 0% is completely transparent
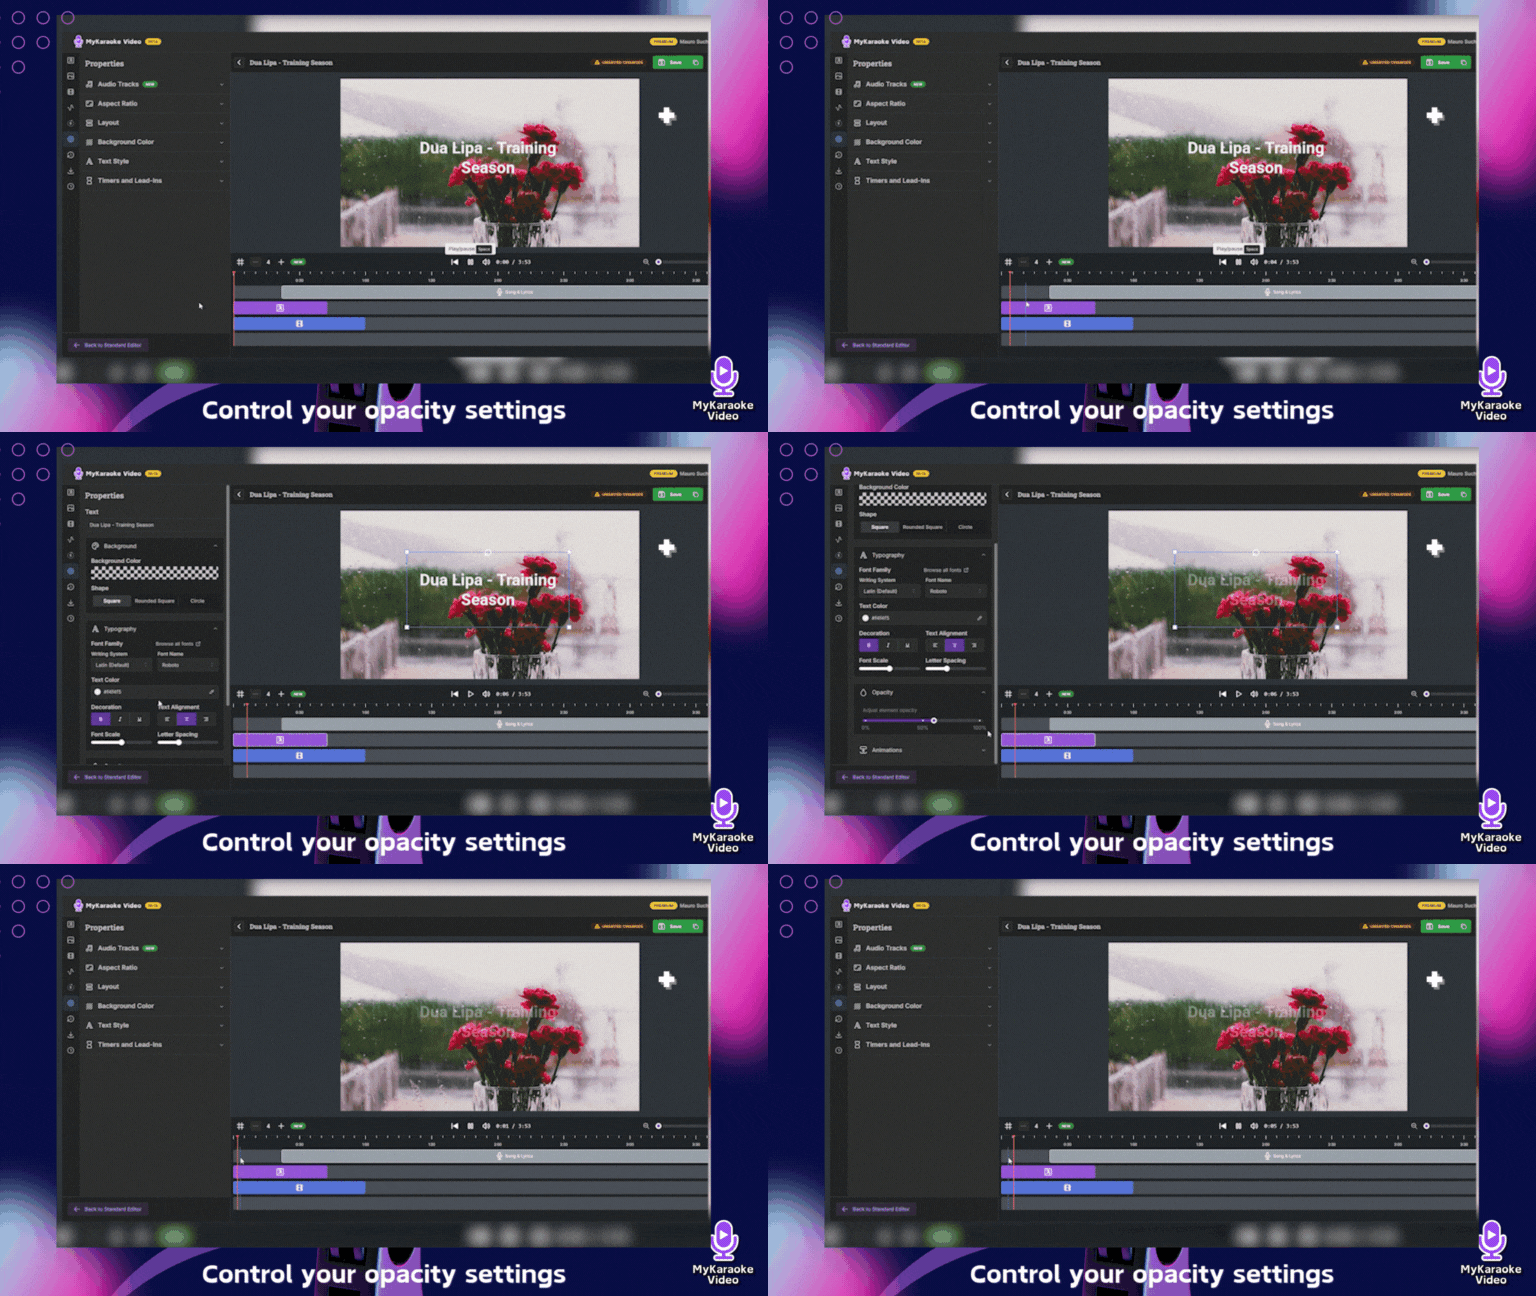
This is especially useful when placing text over video content
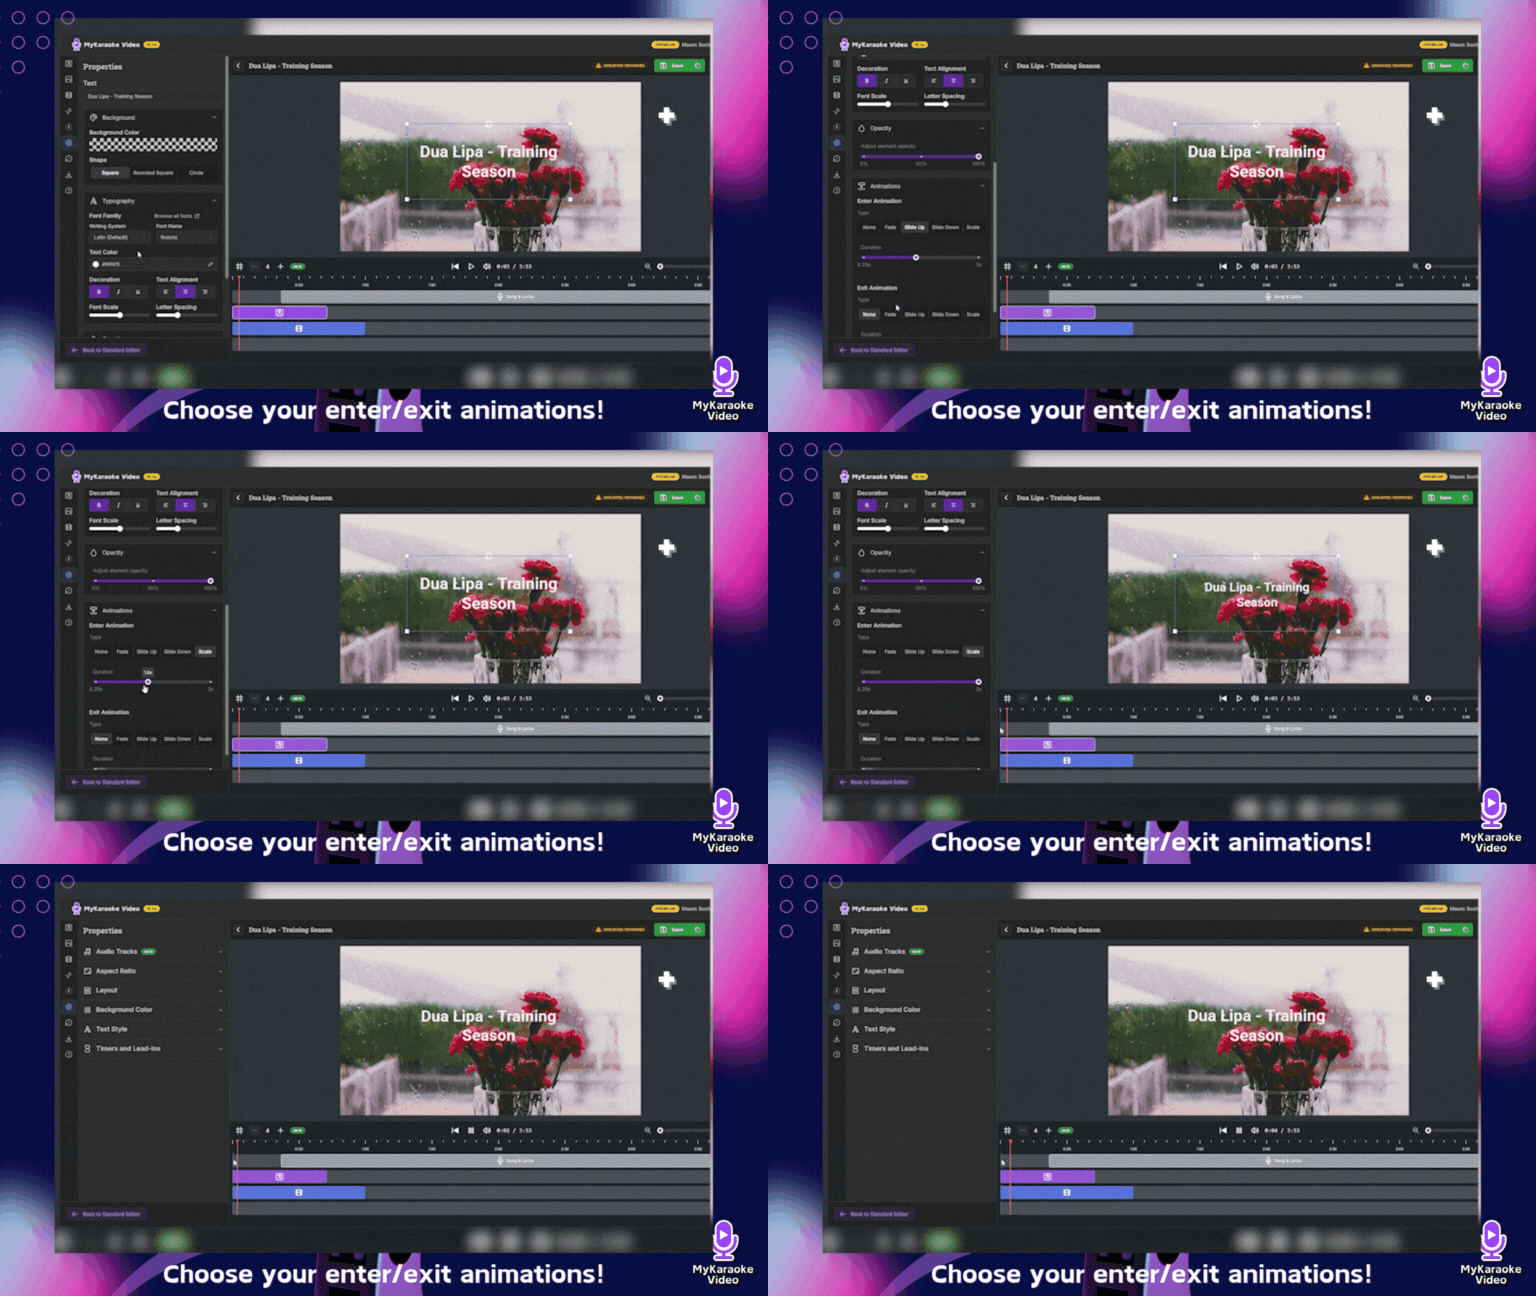
Expand the Animations menu to add dynamic effects to your title
Choose from two animation categories:
Enter Animation: Controls how your text appears on screen
Exit Animation: Controls how your text disappears
Adjust the duration slider for each animation (from 0.25s to 3s)
Shorter durations create snappier animations, longer durations create smoother effects
Text Not Visible: Ensure the text color contrasts with your background. Also, the Advanced Editor uses a track hierarchy system - lower tracks take precedence over higher tracks. Make sure your "A" text block remains on the lowest track number (track #1) to ensure it appears in front of any content on higher-numbered tracks
Text Block Too Short: If your text disappears quickly, extend the purple "A" block on the timeline
Text Size Issues: Use the Font Scale slider to adjust text size for better visibility
Keep your intro brief (3-7 seconds is typically ideal)
Use contrasting colors for better readability
Center your text for a balanced look
Consider adding both the song title and artist name
Keep text simple and legible
Use opacity settings to make text blend naturally with background
Try subtle animations to make your intro more engaging
For karaoke videos, make sure your intro style matches the mood of the song
